Ingredients
Method
Step 1: Prepare Your Spice Bundle
- Before anything else, I create what I call the "spice vessel"—securing all your aromatics in cheesecloth or tea pouches so they infuse without fragmenting into the finished dish. Take two large tea pouches or cut a 6-inch square of cheesecloth. Add your cinnamon sticks, black cardamom pod, Sichuan peppercorns, star anise pods, whole cloves, dried tangerine peel, bay leaves, white peppercorns, liquorice slices, whole nutmeg, and fennel seeds if using. Bundle it tightly—I tie mine with kitchen twine so it won't come loose during the long simmer. This little packet is going to become your kitchen's secret ingredient. When you open it at the end, the aroma that escapes is pure magic. Preparation time: 5 minutes.

Step 2: Prepare and Parboil the Beef Shank
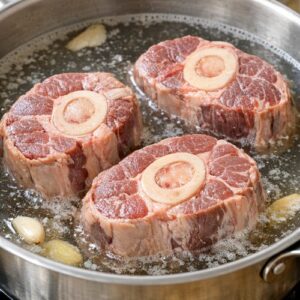
- Cut your beef shank into 2-3 equal cross-sections, each about 5-6 inches long. You want them substantial enough to hold together but manageable enough to fit comfortably in your pot. Don't skip this step—the size affects cooking time and texture. Fill a medium to large pot with water and bring it to a boil. Add your beef shank pieces and ginger slices. Let it come to a rolling boil, watching for a grayish film to form on the water's surface—this takes about 5-8 minutes. This film is impurities rising: blood proteins, bone marrow particles, all the things that would cloud your final broth. When you see that film clearly covering the surface, remove the pot from heat. Pour everything into a colander set in your sink. Rinse the beef shank pieces thoroughly under cool running water, rubbing gently to remove any remaining film. Rinse your pot clean as well—this is crucial for a pure-tasting final dish. Total time: 15 minutes.
Step 3: Build Your Braising Pot
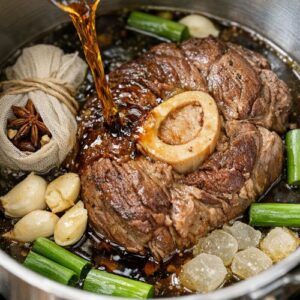
- Return your cleaned beef shank to the pot. Add your spice bundle, then add the Shaoxing wine, smashed garlic cloves, scallion pieces, rock sugar, light soy sauce, dark soy sauce, and about 4 cups of water or stock. The liquid should cover the beef by about an inch—if you need more, add water now. This step is where I pause and breathe. Looking at all these ingredients about to become one unified dish reminds me why my grandmother loved cooking. Each ingredient carries history, nutrition, tradition. You're not just combining ingredients; you're joining thousands of kitchens across generations. Prep time: 5 minutes.
Step 4: Bring to a Boil, Then Settle Into a Simmer
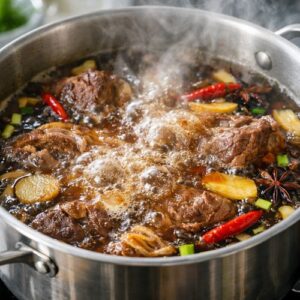
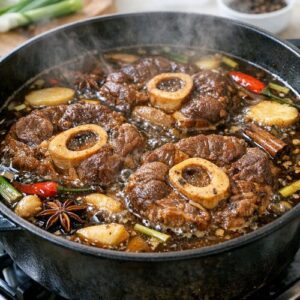
- Bring everything to a rolling boil over medium-high heat. You'll see the liquid roiling, steam rising, the first tastes of flavor escaping into your kitchen. Once it reaches a full boil, reduce the heat immediately to low, aiming for just 2-3 small bubbles breaking the surface every few seconds. This is the most important step: the difference between braising and boiling. Boiling breaks down meat fibers through violent agitation; braising coaxes them into tenderness through gentle, moist heat. The surface should barely move. If you hear vigorous bubbling, your heat is too high. Lower it further. The smell should be intoxicating—warm spices beginning their slow dance with beef and liquid. Heat adjustment: 2 minutes.
Step 5: The Long Simmer—Patience Rewarded
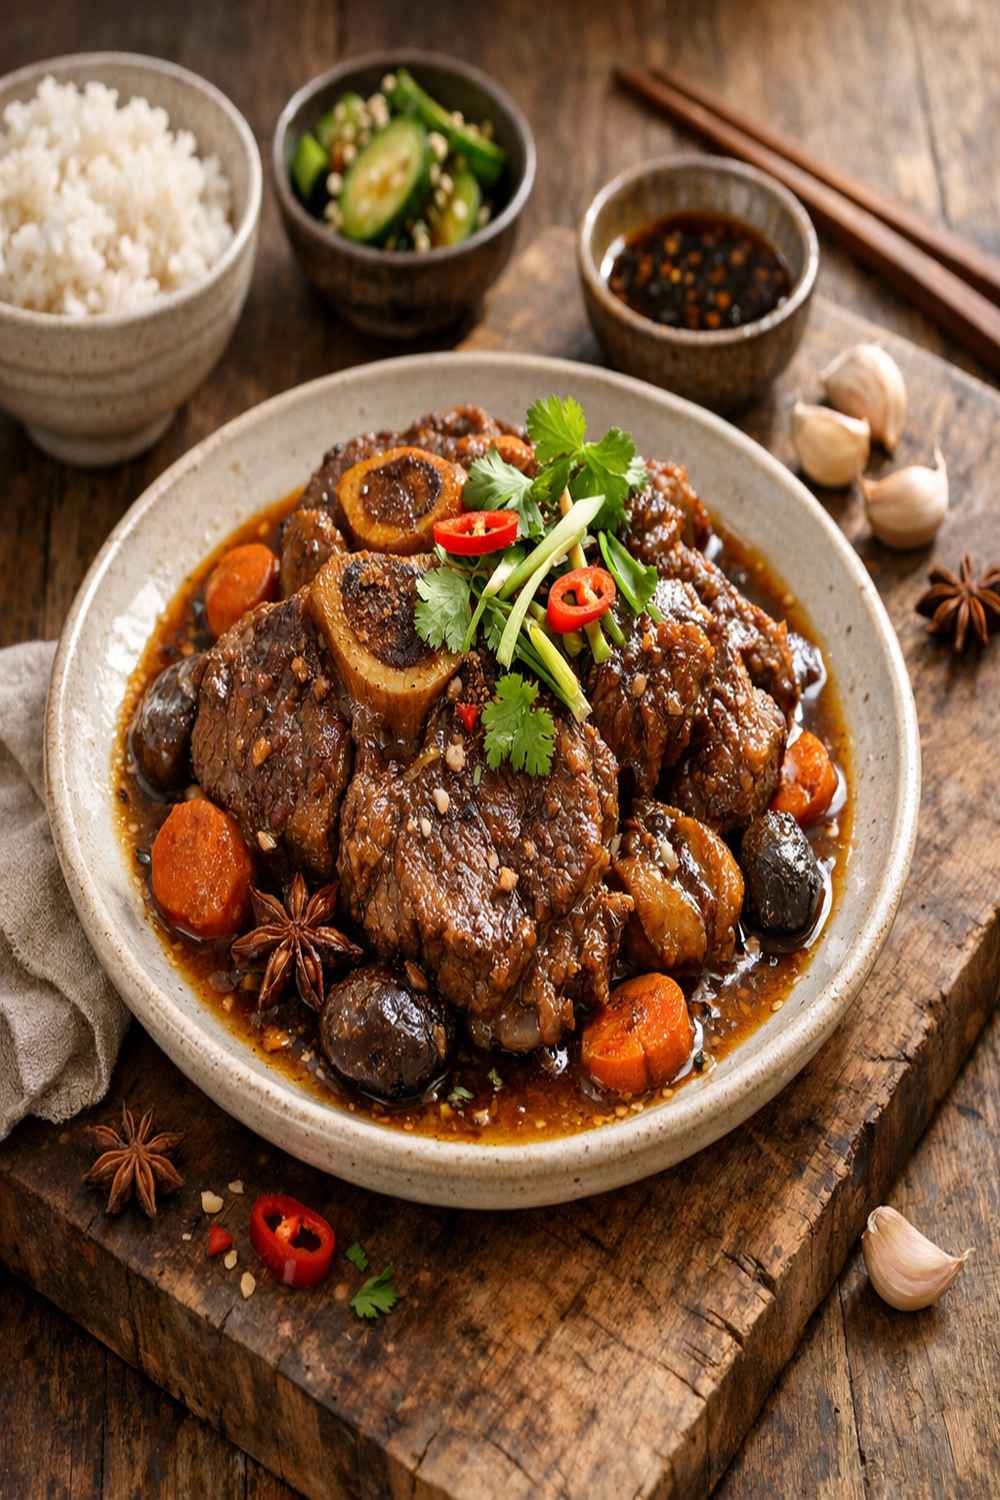
- Allow the beef to simmer gently for 60 to 90 minutes, depending on the thickness of your shank pieces and your specific stovetop. My grandmother would check at the 45-minute mark by piercing the meat with a fork—if it resisted, it needed more time; if it gave way easily, it was approaching readiness. Around 60 minutes, pierce the thickest part of the largest piece with a fork. The meat should be fork-tender, offering almost no resistance, nearly falling from the bone. The braising liquid should have reduced slightly, concentrating in flavor and becoming glossier from the dissolved gelatin. The kitchen should smell like a memory—warm, safe, full of promise. Don't overcook beyond this point. Overcooked beef shank becomes mushy and loses its beautiful texture. You're aiming for that sweet spot: tender enough to eat with a spoon, structured enough to hold its shape. Total cooking time: 60-90 minutes depending on thickness.
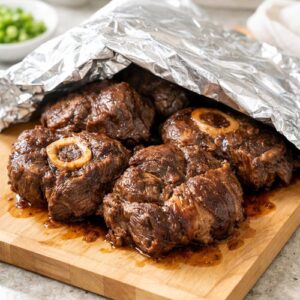
Step 6: Rest and Cool Before Slicing
- Remove the beef shank pieces from the pot with tongs or a slotted spoon and place them on a clean cutting board or serving platter. Cover loosely with foil to keep them warm while they cool slightly. This resting period—about 10-15 minutes—allows the meat fibers to set, making slicing cleaner and more beautiful. While the beef rests, you can strain your braising liquid if you prefer a cleaner presentation, removing the spice bundle and aromatics. Or leave them in for deeper flavor and rustic presentation—my grandmother always left them in, saying they'd earned their place in the pot. Pro move: After the beef cools completely, you can return it to the braising liquid and refrigerate overnight. The flavors will deepen, the gelatin will set slightly, and everything becomes more delicious. When reheating gently on the stovetop or in the oven at 325°F, the flavors will have melded into something even more profound. Cooling time: 15 minutes; optional overnight rest: 8-12 hours.
Notes
- Use a Heavy Pot with a Tight Lid - A Dutch oven or heavy-bottomed pot with a well-fitting lid maintains consistent temperature and prevents too much liquid from evaporating. The lid should fit snugly but not seal completely.
- Don't Skip the Parboiling Step - This creates a cleaner, more refined-tasting final dish. It's not extra work; it's essential technique.
- Adjust Your Heat Carefully - Low and slow means you should barely see movement in the liquid. If you're hearing bubbles, your heat is too high. Better too low than too high.
- Use Good Quality Soy Sauce - Cheap soy sauce is thin and overly salty. Invest in a good light and dark soy sauce; you'll taste the difference immediately in the finished dish.
- Taste and Adjust at the End - Don't salt heavily at the beginning. Taste your braising liquid after the beef is cooked and adjust seasoning then. The flavors will have concentrated.
- The Braising Liquid is Liquid Gold - Save every drop. Use it as a base for soups, to reheat the beef, or to braise vegetables. It's full of collagen and nutrients.