Ingredients
Method
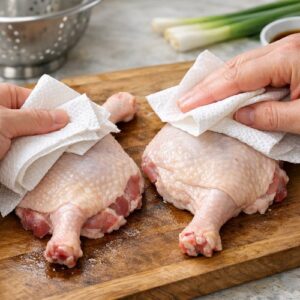
Step 1: Prepare Your Duck Legs With Care
- Begin by rinsing your duck legs under cool running water and patting them completely dry with paper towels. This step is non-negotiable. Moisture on the skin will steam rather than sear, preventing the development of that crucial Maillard reaction crust. I like to inspect for any stray feather shafts—they occasionally hide near the thighs—and remove them with tweezers. Trim away any excessive fat deposits hanging from the underside, but leave the skin intact. That fat you trim becomes liquid gold: render it slowly in a low oven and store it in your refrigerator for up to three months. I use it for roasting vegetables, making pastry, or starting soups.
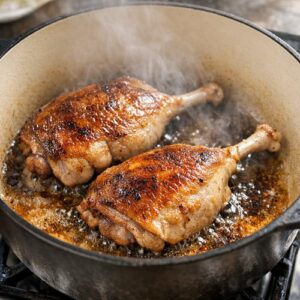
Step 2: Sear the Duck Legs at High Heat
- Heat a deep skillet or Dutch oven over medium-high heat until it's quite hot—you should feel significant heat radiating from the surface when you hold your hand 6 inches above it. This is the foundation of flavor development. Add your duck legs skin-side down without moving them. This patience is crucial. For approximately 12-15 minutes, resist the urge to move, flip, or fidget. During this time, the fat renders gradually, the proteins denature, and that golden-brown crust develops through the Maillard reaction. You'll know it's ready when the skin releases easily from the pan and has turned a deep golden amber—not burned, but rich and caramelized.
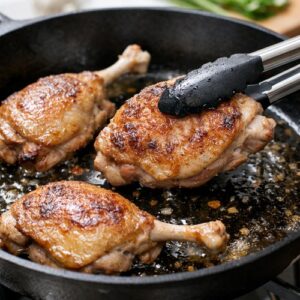
Step 3: Flip and Sear the Meat Side
- Using tongs, flip each duck leg to the meat side and sear for approximately 1 minute. You're not trying to cook this side thoroughly; you're simply sealing it and creating surface color. The meat side needs less time because it has less fat to render. At this point, you may notice the meat releasing juices—this is normal and desirable. These juices contain myoglobin (the iron-containing protein) and dissolved amino acids that create savory depth.
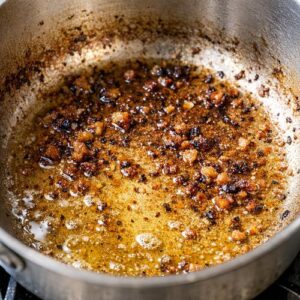
Step 4: Remove Duck and Manage the Fat
- Transfer the seared duck legs to a plate. Look at your pot: you should see a significant pool of rendered fat and the flavorful browned bits (called fond) stuck to the bottom. Carefully pour off most of this fat into a fine-mesh strainer set over a heatproof container. I typically remove about 3-4 tablespoons, leaving approximately 1-2 tablespoons in the pot. This remaining fat becomes the base for your braising liquid and carries flavor forward. The fat you've strained will solidify as it cools and can be refrigerated for several weeks.
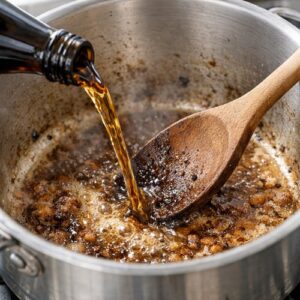
Step 5: Build Your Braising Liquid
- With that remaining fat in the pot, add your Shaoxing wine (or substitute), pouring it slowly while scraping the fond from the bottom with a wooden spoon. This deglazing step extracts flavor compounds that have caramelized onto the pot surface. Let this reduce slightly for about 1-2 minutes, then add your stock, soy sauce, oyster sauce, white pepper, sesame oil, ginger slices, and sliced garlic. If using them, add the star anise and bay leaf. The mixture should smell deeply aromatic—warm ginger notes mixing with savory umami. At this point, the liquid will be slightly cloudy and dark, which is exactly right. Bring everything to a gentle simmer.
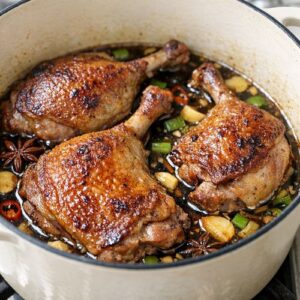
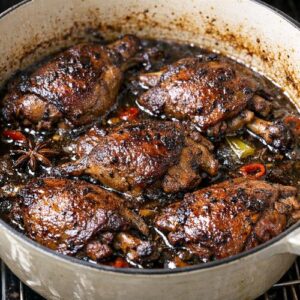
Step 6: Return Duck and Transfer to Oven
- Place the duck legs back into the pot skin-side up. The braising liquid should come approximately halfway up the sides of the duck legs—not submerging them completely. If it seems to be covering more than 75% of the meat, add a splash more stock; if it's below the midpoint, add a bit more. The exposed skin will remain crispy while the submerged portions become incredibly tender. Bring the liquid back to a simmer on the stovetop, then transfer the entire Dutch oven (covered or uncovered, though I prefer uncovered for better browning) to a 400-degree oven.
Step 7: The First Braising Phase
- Cook uncovered for 30 minutes. What's happening inside is significant: the heat is gradually converting collagen in the connective tissue into gelatin. The proteins are slowly denaturing rather than seizing up (which would happen at higher temperatures). The gelatin released into the braising liquid thickens it naturally—no cornstarch or roux needed. After 30 minutes, the meat should be beginning to soften, but it's not yet fall-apart tender.
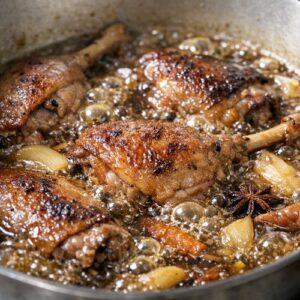
Step 8: The Second Braising Phase
- Lower the oven temperature to 350 degrees and continue cooking uncovered for another 30 minutes, or until the meat is very tender and yields easily to a fork. The lower temperature in this phase prevents the gelatin from breaking down too much and keeps the meat from becoming stringy. You're looking for that sweet spot where the meat is tender enough to shred with gentle pressure but still holds its shape on the bone. The braising liquid should have reduced slightly and thickened noticeably from gelatin extraction.
Notes
- Use a meat thermometer for precision - Duck thighs reach optimal tenderness around 190-195 degrees Fahrenheit internal temperature, which is considerably higher than typical poultry serving temperatures. This higher temperature is necessary for complete collagen conversion to gelatin
- Make this recipe a day ahead - Letting the braised duck rest overnight in the refrigerator allows gelatin to set partially and makes it incredibly easy to skim away any surface fat. It also allows flavors to marry beautifully. Simply reheat gently before serving
- Don't skip the fat-separator step - A fat separator pitcher (also called a gravy separator) removes surface fat while preserving all the gelatin and flavor-packed stock underneath. This dramatically improves the final texture of your sauce while keeping the nutritional benefits intact
- Listen for the simmer, not the boil - A vigorous boil breaks apart the collagen and produces stringy, tough meat. You want a gentle simmer where bubbles barely break the surface, around 180-190 degrees Fahrenheit in the liquid itself