Ingredients
Method
Step 1: Prepare Your Bones and Meat
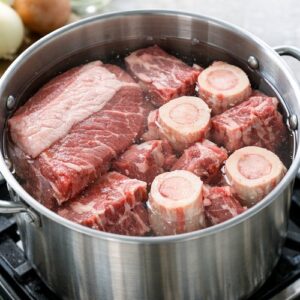
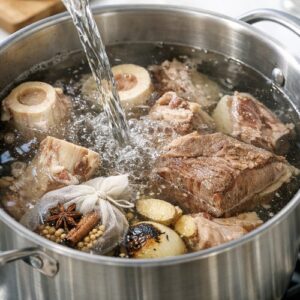
- Begin by placing your beef brisket, meaty bones, and marrow bones into a large pot and covering them completely with cold filtered water. Bring this to a rolling boil over high heat, then let it boil for about 5 minutes. You'll see a grey foam rise to the surface—this is impurities and proteins that didn't bond properly. This step is critical and separates authentic pho broth from cloudy approximations. Many Western cooks skip this "blanching" step, but it's what gives your final broth that beautiful clarity. After the foam has risen substantially, drain everything through a colander and rinse each bone and piece of meat under cool running water, rubbing gently to remove any clinging impurities. Rinse out your pot as well—this is not a step to rush. You're removing the elements that would cloud your broth during the long simmer ahead.
Step 2: Toast Your Spices
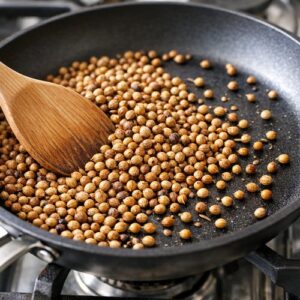
- While your bones cool slightly, place a dry skillet (no oil) over medium heat. Add your coriander seeds and toast them for 2-3 minutes, swirling occasionally, until the aroma becomes fragrant and slightly nutty. You'll notice the seeds darken slightly and begin to pop. This awakens their essential oils and creates a more complex flavor than using them raw. This single step is what distinguishes a broth that tastes alive from one that tastes flat. Transfer the toasted coriander seeds to a small bowl and set aside. You'll add them later during the simmer.
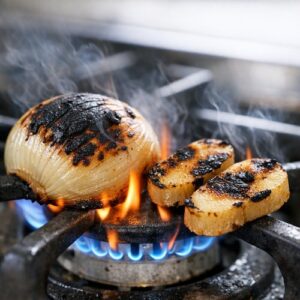
Step 3: Char Your Aromatics
- This step is where the flavor magic truly begins. Take your halved onions and ginger slice and place them cut-side down directly on a gas flame or under a hot broiler. Let them char until blackened in spots—about 3-4 minutes per side. The goal isn't to cook them through; it's to create a light char that deepens their flavors and adds subtle bitterness that grounds the broth. If you have an electric stove, use your highest-heat setting or a cast iron skillet. The char should smell almost toasted, not burnt. This charring is what Vietnamese cooks have done for generations—it's not optional if you want authentic flavor. The blackened exterior will seem like it's going to make your broth bitter, but it won't. Instead, it adds complexity that pure onion and ginger alone simply cannot provide.
Step 4: Begin Your Long Simmer
- Return your cleaned bones and brisket to the pot (or to a clean pot if you prefer) and cover with your 3.5 liters of fresh filtered water. Add your charred onions and ginger, the star anise, cinnamon quills, cardamom pods, and whole cloves. Do not add salt, sugar, or fish sauce yet—these will be adjusted at the end when you can taste the actual broth. Bring everything to a gentle simmer over medium-high heat. Once it reaches a simmer, reduce the heat to the lowest setting. The surface should barely move—just occasional small bubbles rising gently. A rolling boil at this point emulsifies fats and creates cloudiness. This is the most important heat adjustment of the entire process. Let this simmer for 12-16 hours. Yes, hours. Overnight is ideal. The longer you simmer, the more collagen converts to gelatin, and the more deeply the aromatics infuse. If you're concerned about safety, you can simmer for 12 hours, turn off the heat, let it cool, then refrigerate overnight and resume for another 2-4 hours the next day. The broth will develop beautifully this way, and you'll have better control.
Step 5: Skim and Strain
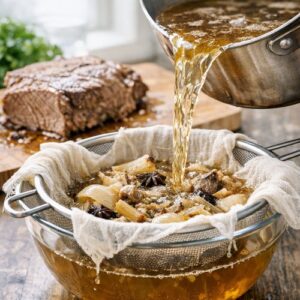
- After your long simmer, carefully remove the brisket and set it aside on a cutting board to cool slightly. Using a fine-mesh strainer lined with cheesecloth, pour the broth through slowly. This removes all solids while preserving the liquid gold you've created. Let the strained broth settle for a few minutes, then skim off excess fat from the surface using a fat separator or large spoon. Don't remove all the fat—some carries flavor and nutrition. A thin layer of rendered fat on top of your finished broth is perfectly authentic and actually protective (it seals out air and extends storage life).
Step 6: Season to Perfection
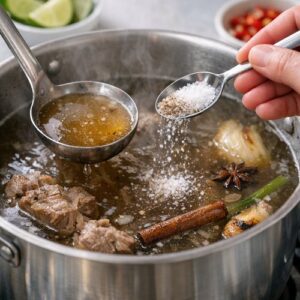
- This is where your broth transforms from excellent to transcendent. Taste it first. You should taste clear beef flavor, the subtle warmth of the spices, and the depth that only long cooking creates. Now add 2 tablespoons of white sugar and stir until dissolved. Taste again—the sweetness should be invisible, just a rounded note beneath everything else. Add 1 tablespoon of salt and stir. Taste. Now comes the fish sauce—add it in small increments, tasting after each addition. Start with 30 milliliters (about 2 tablespoons), then taste. Fish sauce is potent; it's easy to overdo. You want the umami to deepen the broth, not make it taste "fishy." This is where many home cooks fail—they either skip the fish sauce entirely (losing crucial umami) or add too much (making the broth off-balance). I typically end up using around 40 milliliters total, but this depends on your fish sauce brand's intensity. Once seasoned to your preference, the broth is ready. If you're not serving immediately, let it cool to room temperature, then refrigerate.
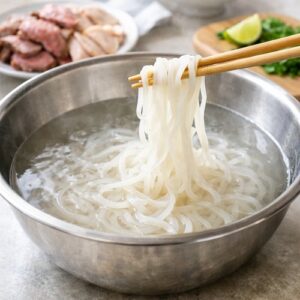
Step 7: Prepare Your Noodles and Meat
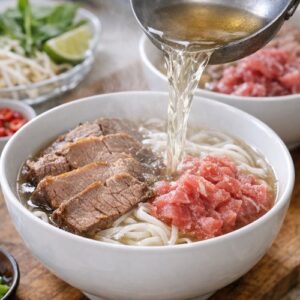
- If using dried rice noodles, prepare them according to package directions—usually a 4-5 minute soak in hot (not boiling) water. Fresh noodles just need a quick rinse under warm water to separate them. Slice your cooked brisket against the grain into pieces about ¼-inch thick. These will be tender enough that a sharp knife cuts through like butter. If you want raw beef tenderloin included, slice it paper-thin—thinner than you think necessary—so it cooks perfectly in the hot broth.
Step 8: Assemble Your Bowls
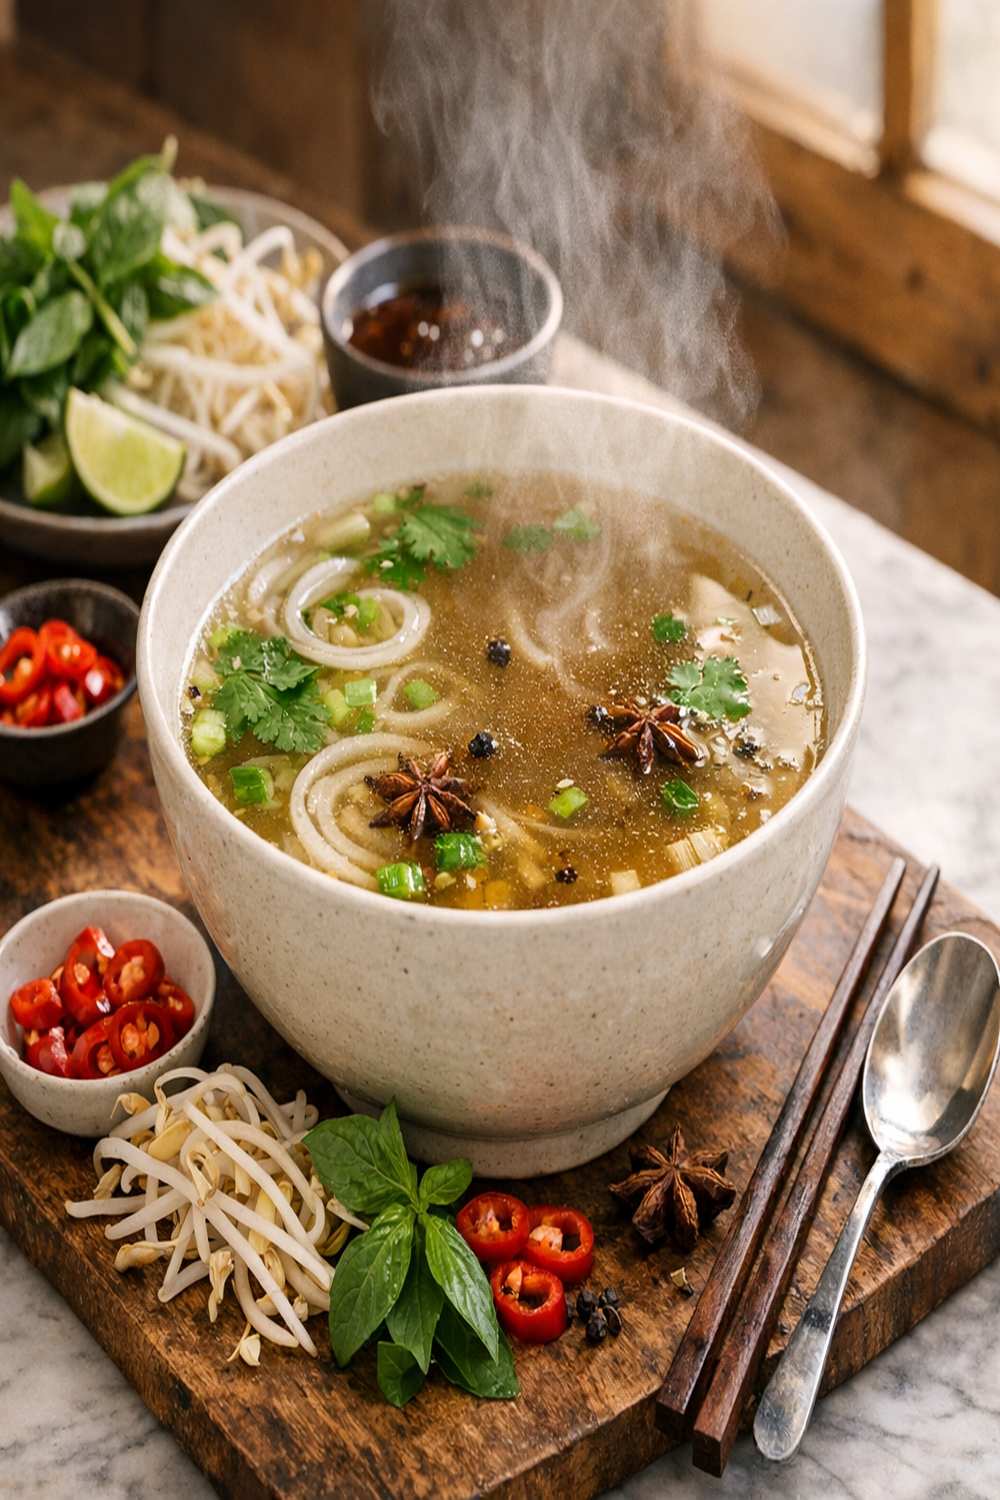
- Heat your broth until steaming but not boiling. Place prepared noodles into each bowl, top with your brisket slices and raw beef (if using), and pour the hot broth over everything. The residual heat cooks the raw beef to a perfect rosy rare. Top with fresh beansprouts, Thai basil, and cilantro. Place lime wedges and sliced chilies on the side—each person seasons their own bowl to their preference. Offer hoisin and sriracha for those who want additional customization.