Ingredients
Method
Step 1: Prepare Your Rice—The Foundation Begins With Washing
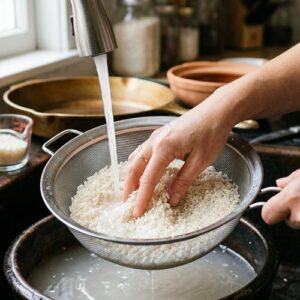
- Measure out 10 ounces of long grain rice and place it in a fine-mesh strainer. Run cool water over it while gently massaging the grains between your fingers. You'll see the water turn cloudy—that's starch, and you're removing surface starch that would otherwise cause the rice to stick together in clumps. Drain completely and repeat this washing process two more times with fresh water. This step teaches you the importance of preparation. Professional cooks understand that how you treat an ingredient before cooking determines 70% of your results. By the third wash, the water should run almost clear. This tells you that the remaining surface starch is minimal, and your rice is ready to cook evenly. Set the washed rice aside. Notice how the grains look now—they should have a slightly translucent appearance, almost crystalline. This is your visual confirmation that you've prepared correctly.
Step 2: Prepare Your Proteins—Understanding Cook Times and Texture
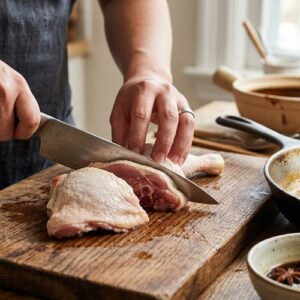
- Take your bone-in chicken thigh and place it on a cutting board. Using a sharp knife, split it in half down the middle first—you'll encounter resistance from the bone, which is exactly right. Once halved, cut each half into pieces roughly 1 to 2 inches wide. If the thigh includes drumstick portions, cut those into similar-sized pieces. Now prepare your chicken breast by cutting it into pieces of approximately the same size. This consistency in size is critical—it ensures that both cuts, which have different muscle fiber densities and fat content, will finish cooking at roughly the same time. The thigh, being darker meat with more connective tissue, naturally needs slightly longer to break down. The breast, being leaner, cooks faster. By keeping pieces the same size, you're compensating for the inherent differences. Pat both sets of chicken completely dry with paper towels. Dry surfaces absorb marinade ingredients more effectively than wet ones. This is a professional technique: moisture creates a barrier that prevents marinades from penetrating. Now combine both the thigh and breast pieces in a bowl. Prepare your Chinese sausage by slicing it diagonally into ¼-inch thick pieces. The diagonal cut isn't just for appearance—it increases surface area, which means more fat will render into the oil and distribute through the pot. This fat becomes your cooking medium and flavor base.
Step 3: Marinate Your Chicken—Building Flavor at the Molecular Level
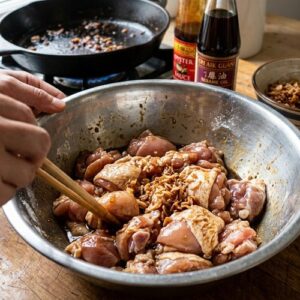
- In a separate bowl, combine your dried chicken pieces with: 1 tablespoon of oyster sauce, 1 teaspoon of sesame oil, ½ teaspoon of cornstarch, 3 tablespoons of water, 1 teaspoon of Shaoxing wine, ¼ teaspoon of white pepper, and ½ teaspoon of salt. Notice what each component does: The oyster sauce brings umami. The sesame oil adds a toasted aroma. The cornstarch creates a protective barrier that helps retain moisture during cooking. The water allows the marinade to coat evenly. The Shaoxing wine removes any gamey flavors. The white pepper adds heat without coloring the broth. The salt begins the seasoning process. Gently toss the chicken to coat thoroughly. Let this sit at room temperature for 15 minutes. This isn't a long marination by accident—we're not breaking down proteins deeply, which would make them mushy. We're just coating them with flavor and creating the protective starch barrier. This is the difference between a tender chicken and one that's fallen apart into the rice.
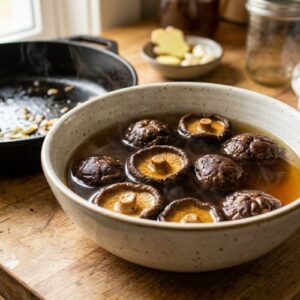
Step 4: Rehydrate and Prepare Your Mushrooms—Extracting Hidden Umami
- Place your 1 ounce of dried shiitake mushrooms in a bowl and cover with 8 ounces of hot water. Let them sit for 15 minutes until they're completely tender. Save this soaking liquid—it's liquid gold. The water has extracted the mushroom's polysaccharides, amino acids, and compounds that create depth. You'll use this for the cooking liquid. Once softened, remove the mushrooms and cut away the tough stems entirely—discard them. Slice the mushroom caps into thirds. If your mushrooms are particularly large, cut them into more pieces. If they're smaller, halving is fine. You want pieces roughly the size of your chicken chunks so they cook evenly and integrate visually. In a small bowl, combine your prepared mushroom pieces with ½ tablespoon of oyster sauce, 1 teaspoon of sugar, and ½ teaspoon of cornstarch. Toss gently so each piece is lightly coated. This light glaze protects the mushrooms from disintegrating during the extended cooking while adding additional savory depth.
Step 5: Build Your Aromatics Base—The Foundation of Flavor
- Finely mince 1 shallot and 1 tablespoon of fresh ginger. These aromatics will create the flavor base of your dish. The shallot brings sweetness that mellows over time. The ginger adds warmth and aids digestion—your grandmother knew this intuitively, your body knows it inherently, and modern nutrition confirms it. Have these measured and ready. Choppers and mincer tools are fine, but I prefer a sharp knife because it keeps the aromatics' volatile oils intact. When you crush or process aromatics, you release those oils all at once. With a knife, they release gradually as you cook, building flavor in layers. Chop 2 stalks of scallion into ½-inch pieces and separate the white and light green parts from the darker green tops. Keep these separate—the lighter parts go into the pot; the darker greens are your fresh garnish.
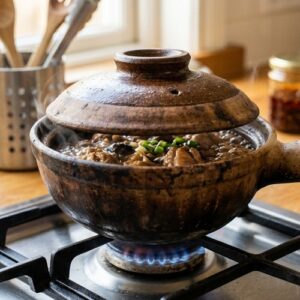
Step 6: Prepare Your Clay Pot and Begin Cooking—Heat Management Is Everything
- Before you touch the heat, read this carefully: Clay pots are prone to cracking on electric stove surfaces. The concentrated heat directly below can cause thermal shock. If you have a gas stove, place your clay pot directly over medium heat. If you're using electric, place a metal ring trivet or a wok ring between the stove and the pot to distribute heat. Add 2 tablespoons of neutral cooking oil to your clay pot and set it over medium heat. Wait for the oil to shimmer. This shimmer is your signal that the pot has reached the right temperature—around 350°F. You're not looking for smoking oil; you want gentle heat that renders fat rather than shocking proteins. Add your sliced Chinese sausage to the hot oil. Let it sit undisturbed for 30 seconds, then stir. You'll hear a gentle sizzle—this is your audio confirmation of correct heat. The sausage will begin releasing its oils almost immediately. Continue stirring for about 2 minutes until the sausage pieces have rendered some fat and the edges are just beginning to brown.
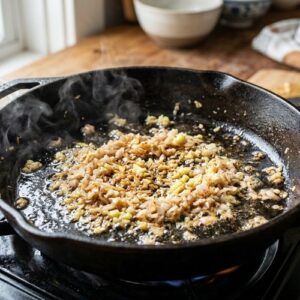
Step 7: Add Your Aromatics—Building Aromatic Depth
- Add your minced shallot and ginger to the pot with the sausage. Stir constantly for about 1 minute. You're releasing the aromatic compounds without browning them into bitterness. Your kitchen will smell incredible. This is the moment when you're building the flavor foundation that will season every grain of rice and every piece of protein. If you have the white parts of your scallions (remember, we're keeping the dark greens for garnish), add them now and stir for another 20 seconds. The aromatics should be fragrant and just slightly softened, never browned or crispy.
Step 8: Add Your Chicken and Mushrooms—Layering Proteins and Vegetables
- Pour the marinated chicken into the pot with the aromatics and sausage. Stir constantly for 3 to 4 minutes. You're not trying to cook the chicken through—you're just trying to break the raw texture so it's no longer pale. The exterior should turn opaque while the interior remains quite pink. This is the perfect stopping point because the chicken will continue cooking gently with the rice. Add your prepared mushroom pieces and stir gently to distribute them throughout the pot. Everything should be loosely combined, not packed.

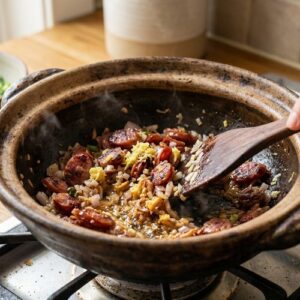
Step 9: Add Your Washed Rice—The Heart of the Dish
- Add your 10 ounces of washed rice directly to the pot with all the other ingredients. Stir constantly for about 1 minute. You're coating every grain with the aromatic oil and allowing it to absorb the flavors of the sausage, mushrooms, and aromatics. This is a crucial step that home cooks often skip, which is why their clay pot rice lacks depth. After 1 minute of stirring, add your 11 ounces of boiling water. This is your exact liquid-to-rice ratio—a technique you'll use forever for long grain rice. The water should just barely cover the rice. Stir once more to ensure nothing is sticking to the bottom. Now add 1 tablespoon of soy sauce, 2 tablespoons of oyster sauce, 1 teaspoon of sugar, and ½ teaspoon of salt. Notice that we've already seasoned the chicken, the aromatics, and the sausage, so we're using measured seasoning here to avoid over-salting. Stir to combine everything thoroughly.
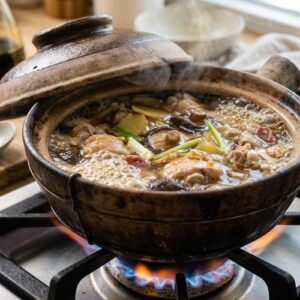
Step 10: Bring to a Boil, Then Transition to Gentle Heat—The Critical Temperature Change
- Increase the heat to medium-high and bring the pot to a boil. You'll see the liquid begin to bubble vigorously around the edges first, then across the entire surface. This should take 3 to 4 minutes. Let it come to a full, rolling boil—don't interrupt this phase. Once the boil is vigorous, immediately reduce the heat to the lowest setting on your stove. This transition from high to low heat is where the magic of clay pot cooking happens. The gentle, low heat will allow the rice to absorb the liquid slowly, and the proteins to cook through without seizing or becoming tough. Place the lid on the pot. If your lid has a small hole for steam, leave it as is. If it's completely sealed, you're fine—clay pots are designed to manage moisture. Do not remove the lid for at least 15 minutes. This is where patience becomes your greatest cooking technique. Removing the lid lets steam escape and disrupts the cooking temperature.
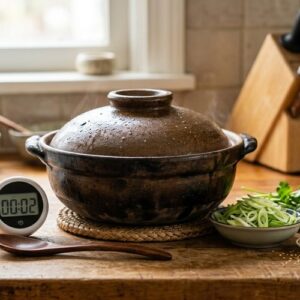
Step 11: The Waiting Period—Trusting the Process
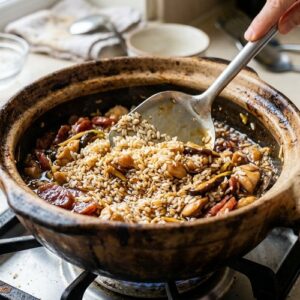
- Set a timer for 15 minutes. Do not open that pot. This is hard, I know. Your grandmother faced the same temptation, and she learned to trust the process. During these 15 minutes, the rice is absorbing liquid, the proteins are cooking gently, and the flavors are melding at the molecular level. What's happening inside the pot: The temperature has dropped to around 180 to 200°F—low enough to prevent violent boiling but high enough to cook everything through. The rice grains are absorbing the liquid gradually. The chicken is reaching a safe internal temperature (165°F) without becoming rubbery. The mushrooms are softening and releasing their umami compounds into the broth. After 15 minutes, very carefully open the lid—steam will rise forcefully, so angle the lid away from your face. Look at the rice. It should have absorbed most of the liquid, but shouldn't be completely dry. There should be just a light film of liquid visible between some grains. If you see water pooling, give it another 2 to 3 minutes with the lid on. If it looks dry, we're ready for the next step.

Step 12: Develop the Socarrat—Creating the Prized Crispy Bottom Layer
- Once the rice has absorbed the liquid, increase the heat to medium-high. You're about to develop the socarrat—that golden, crispy layer at the bottom of the pot that many people consider the best part of the dish. You'll hear a gentle crackling sound from the bottom of the pot. After about 1 minute, you might smell a hint of toastiness—this is perfect. After 2 minutes of this crackling sound, we're done. The bottom layer of rice is now browning just enough to create caramelization without burning. The key is listening and smelling, not looking. You can't see into a clay pot's bottom easily, so your other senses guide you. If the smell becomes acrid or burned, reduce the heat immediately. If the crackling becomes intense popping, reduce the heat. We're going for a gentle toast, not a char. Once you've achieved this golden layer (you'll know from the smell and sound), remove the pot from heat immediately.
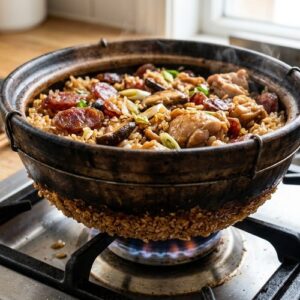
Step 13: Rest and Garnish—The Final Revelation
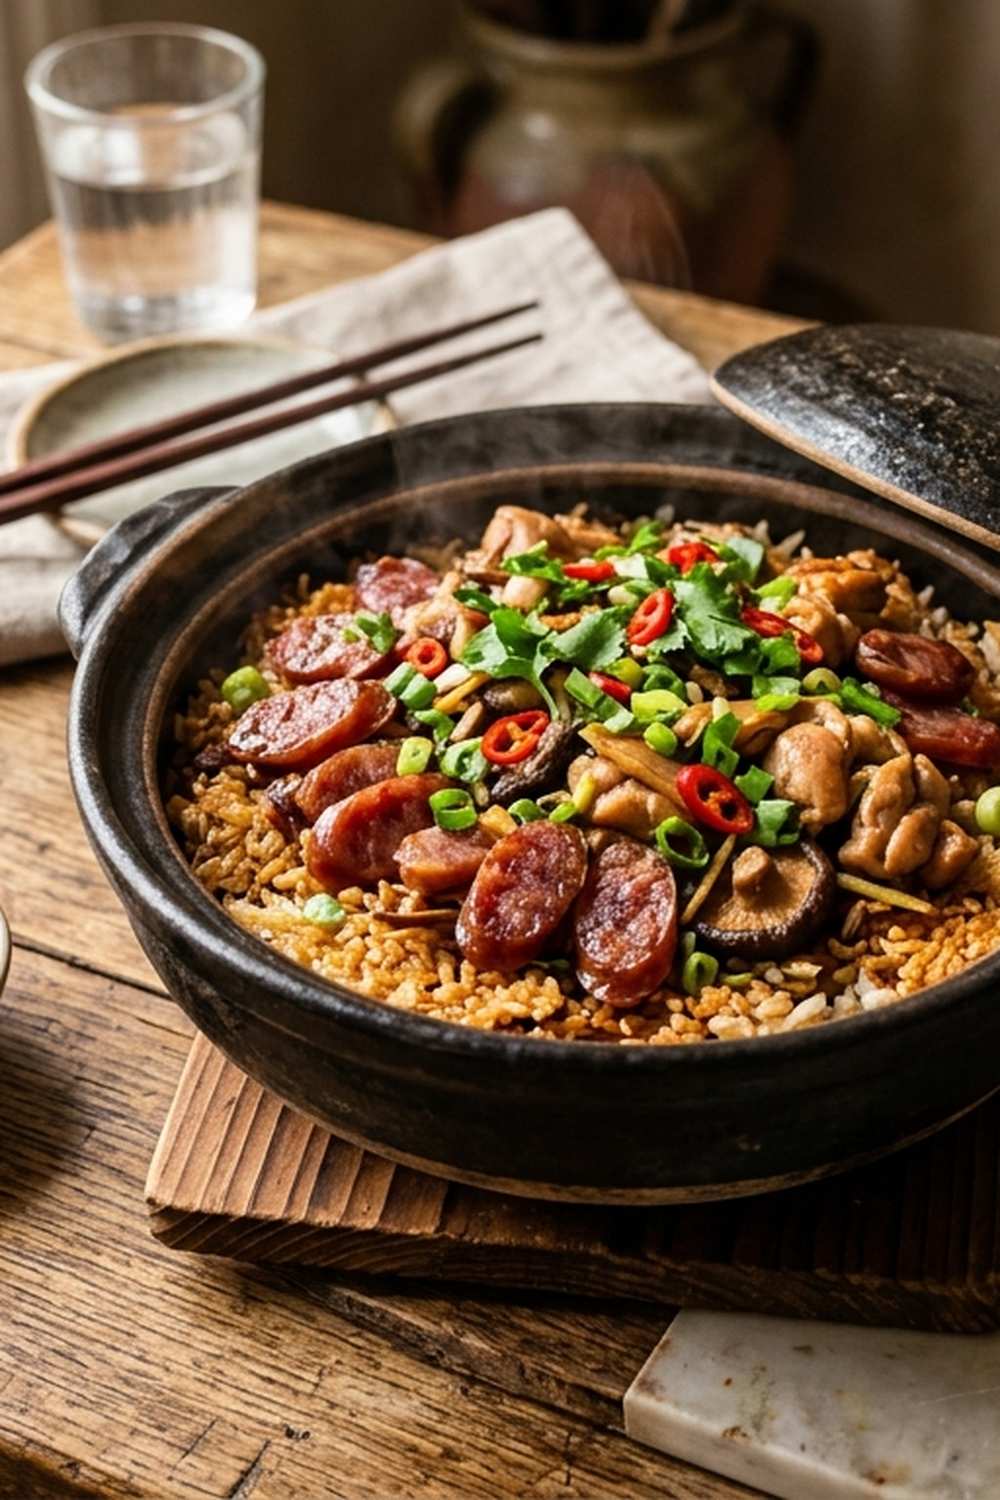
- Let the pot sit, covered, for 2 minutes. This resting period is essential. It allows the internal temperature to equalize and prevents the rice from drying out immediately after you remove it from heat. Now comes the moment of truth. Remove the lid—take a second to appreciate the explosion of aroma that rises from the pot. Everything has melded: the sausage's savory fat, the mushroom's earthy umami, the chicken's delicate sweetness, the shallot's mellow depth. It should smell like home, like history, like love made edible. Immediately sprinkle the dark green scallion parts across the entire surface of the rice. The heat will gently wilt them, releasing their fresh onion aroma that brightens everything below. This garnish is not decoration—it's the final flavor layer that prevents the dish from feeling heavy. Drizzle 1 tablespoon of sesame oil across the top. The heat will activate the toasted sesame compounds, adding another layer of aromatic complexity. Stir gently to distribute everything, and you're finished.
Notes
- The rice tastes mushy and one-dimensional, like it was boiled in plain water - This happened because you didn't coat the rice with the aromatic oil and sausage fat before adding liquid. Next time, stir the rice thoroughly for a full minute after adding it to the pot with aromatics. You're not just mixing—you're distributing every drop of flavor-infused fat across every grain. Also, ensure you've used the exact liquid-to-rice ratio (11 ounces water to 10 ounces rice) and haven't added extra liquid to compensate for lifting the lid.
- The bottom layer is charred black and bitter, not golden and toasted - You left the heat on too high during the socarrat development, or you waited too long without listening for the crackling sound. Next time, reduce heat to medium (not medium-high) after the rice absorbs the liquid. The crackling should be gentle and rhythmic, not intense popping. Stop after 1 to 2 minutes of crackling, before the smell becomes acrid.
- The chicken is rubbery and separated, falling apart into the rice - Either your initial searing was too aggressive (the heat was too high), or you cooked it too long with the rice. Make sure you're using medium heat during the initial sausage and chicken cooking phase, and that you're only partially cooking the chicken before adding liquid. Also check that your marinade had enough cornstarch to create a protective coating.
- Some pieces of chicken are cooked while others are still pink inside, with no consistency - Your chicken pieces were cut to drastically different sizes. The thigh pieces might be 3 inches while breast pieces are 1 inch. Next time, cut everything to exactly 1 to 2 inches. Also ensure you're using bone-in chicken thigh, which takes longer to cook and needs size consistency with the faster-cooking breast.
- The entire pot cracked or broke during cooking - You placed a cold or room-temperature clay pot directly over high heat, or you placed it on an electric stove without a heat distributor. Always use a gas stove with clay pots, or use a metal trivet on electric. Never take a clay pot from the refrigerator and place it directly on heat.