Ingredients
Method
Step 1: Activate Your Yeast (5 minutes active time)
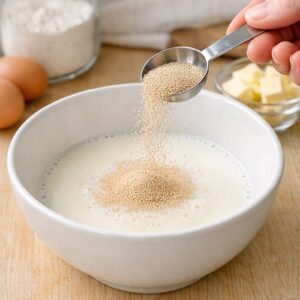
- Pour your warm milk (approximately 110 degrees Fahrenheit—warm enough to activate yeast but not so hot it kills it) into a medium bowl. Sprinkle the 9 grams of active dry yeast over the surface and let it sit untouched for about 2 minutes. This is called "blooming." After 2 minutes, stir gently and let it sit for another 3 minutes. You should see bubbles forming on the surface and smell a pleasant, slightly fermented aroma. For vegan versions, use plant-based milk here—the yeast doesn't care about the source, only the temperature. If you don't see activity after 5 minutes, your yeast may be expired; start over with fresh yeast.
Step 2: Build Your Base (8 minutes mixing time)
- In a large mixing bowl (I prefer glass so I can watch the dough develop), combine your activated yeast mixture with the honey, vanilla extract, and your eggs (or aquafaba for vegan versions). Whisk together gently but thoroughly—you're creating an emulsion that will eventually incorporate butter beautifully. If you're making the vegan version, make sure your aquafaba mixture (12 tablespoons liquid + 3 tablespoons cornstarch) is whisked until completely smooth before adding. This step takes about 3 minutes of whisking. The mixture should be pale, slightly foamy, and homogeneous. Add your sugar (or allulose for keto) and salt to this wet mixture. Whisk for another minute. The salt helps activate the yeast further and balances the sweetness—don't skip it or reduce it, regardless of your dietary version.

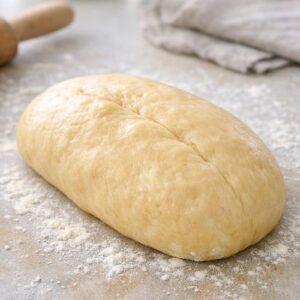
Step 3: Add Flour and Begin Kneading (12 minutes total, 7 minutes kneading)
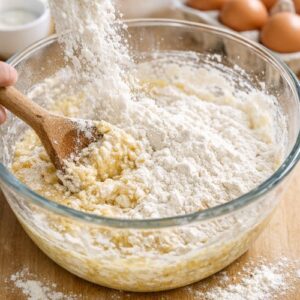
- Gradually add your flour to the wet mixture, stirring with a wooden spoon or dough whisk as you go. For gluten-free versions, combine your 500 grams GF flour blend with ½ teaspoon xanthan gum before adding to the wet ingredients. Once the flour is mostly incorporated and you have a shaggy dough, transfer to a lightly floured work surface (or use a stand mixer fitted with a dough hook if you prefer). Knead for approximately 7 minutes by hand or 5-6 minutes in a stand mixer on medium speed. The dough will feel sticky and a bit rough at first—this is normal. As you knead, it will begin to smooth out and develop elasticity. You're looking for a dough that's smooth, slightly tacky but not sticking to your hands, and springs back when you poke it.
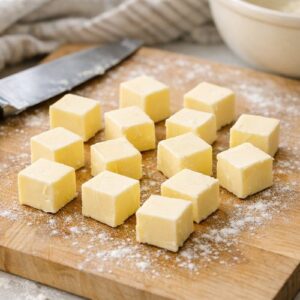
Step 4: The Critical Butter Incorporation (15 minutes)
- This is where brioche becomes brioche. Cut your butter (at room temperature—this is non-negotiable) into approximately 16 small cubes. Cold butter won't incorporate properly; take it out of the refrigerator 30 minutes before you start this recipe. With your dough on the work surface, begin adding butter one cube at a time. Press each cube into the dough, fold the dough over it, and knead until it's fully incorporated before adding the next cube. This takes patience—probably 12-15 minutes total. Initially, the dough will look greasy and separated; keep going. Eventually (and this is magical), the dough will come together into a silky, smooth mass. For vegan versions using vegan butter, which has a lower melting point, work quickly during this step and keep your hands cool if possible. By the end, your dough should be smooth, glossy, slightly sticky, and hold together beautifully when you form a ball. It should feel like soft, supple skin.
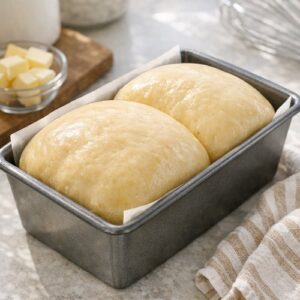
Step 5: First Rise (4-5 hours at room temperature, or overnight in refrigerator)
- Place your dough in a lightly oiled bowl, turning it once to coat all sides. Cover with a damp kitchen towel or plastic wrap. Let it rise at room temperature for 4-5 hours, or cover and refrigerate overnight. The overnight cold rise is my recommendation for all dietary versions—it develops flavor complexity and makes the dough easier to shape. The dough should roughly double in size by the end of this rise. If you're short on time, room temperature rising works fine, but the flavor won't be quite as developed. This is where the slow, patient approach my grandmother taught me really shines—you're not rushing flavor development.

Step 6: Shape Your Loaf (10 minutes)
- Turn your risen dough out onto a lightly floured surface. Gently shape it into a round loaf or an oblong shape, depending on your preference and your baking vessel. If you're using a standard loaf pan, form it into an oblong that will fit snugly. If you prefer a round artisan loaf, shape it into a round. The dough should feel resilient but not dense. Place your shaped dough in a parchment-lined loaf pan (or on a parchment-lined baking sheet if you're doing a free-form round). Cover loosely with plastic wrap or a damp towel.
Step 7: Second Rise (2-3 hours at room temperature, or 8-12 hours cold)
- Let your shaped dough rise again until it's puffy and increased in volume by about 50 percent—not quite doubled, as you want it to have some lift in the oven. This second rise typically takes 2-3 hours at room temperature. You can also do a cold second rise: cover and refrigerate for 8-12 hours, then let come to room temperature for 1-2 hours before baking. This cold rise creates an even better flavor and makes scoring easier if you want to do that. Thirty minutes before you're ready to bake, preheat your oven to 375 degrees Fahrenheit.
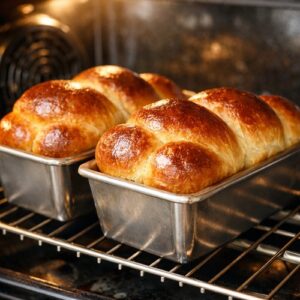
Step 8: Egg Wash and Final Touches (5 minutes prep)
- In a small bowl, whisk together 2 tablespoons water with any remaining egg yolk (or for vegan versions, whisk 2 tablespoons plant-based milk with 1 tablespoon cornstarch until smooth). This is your egg wash—it creates that beautiful golden-brown exterior brioche is known for. Just before baking, gently brush your egg wash over the top and sides of your dough. For vegan versions, the plant milk wash creates a beautiful color, though it won't be quite as glossy as traditional egg wash. If desired, sprinkle a light layer of coarse sea salt on top.

Step 9: Bake (35-45 minutes)
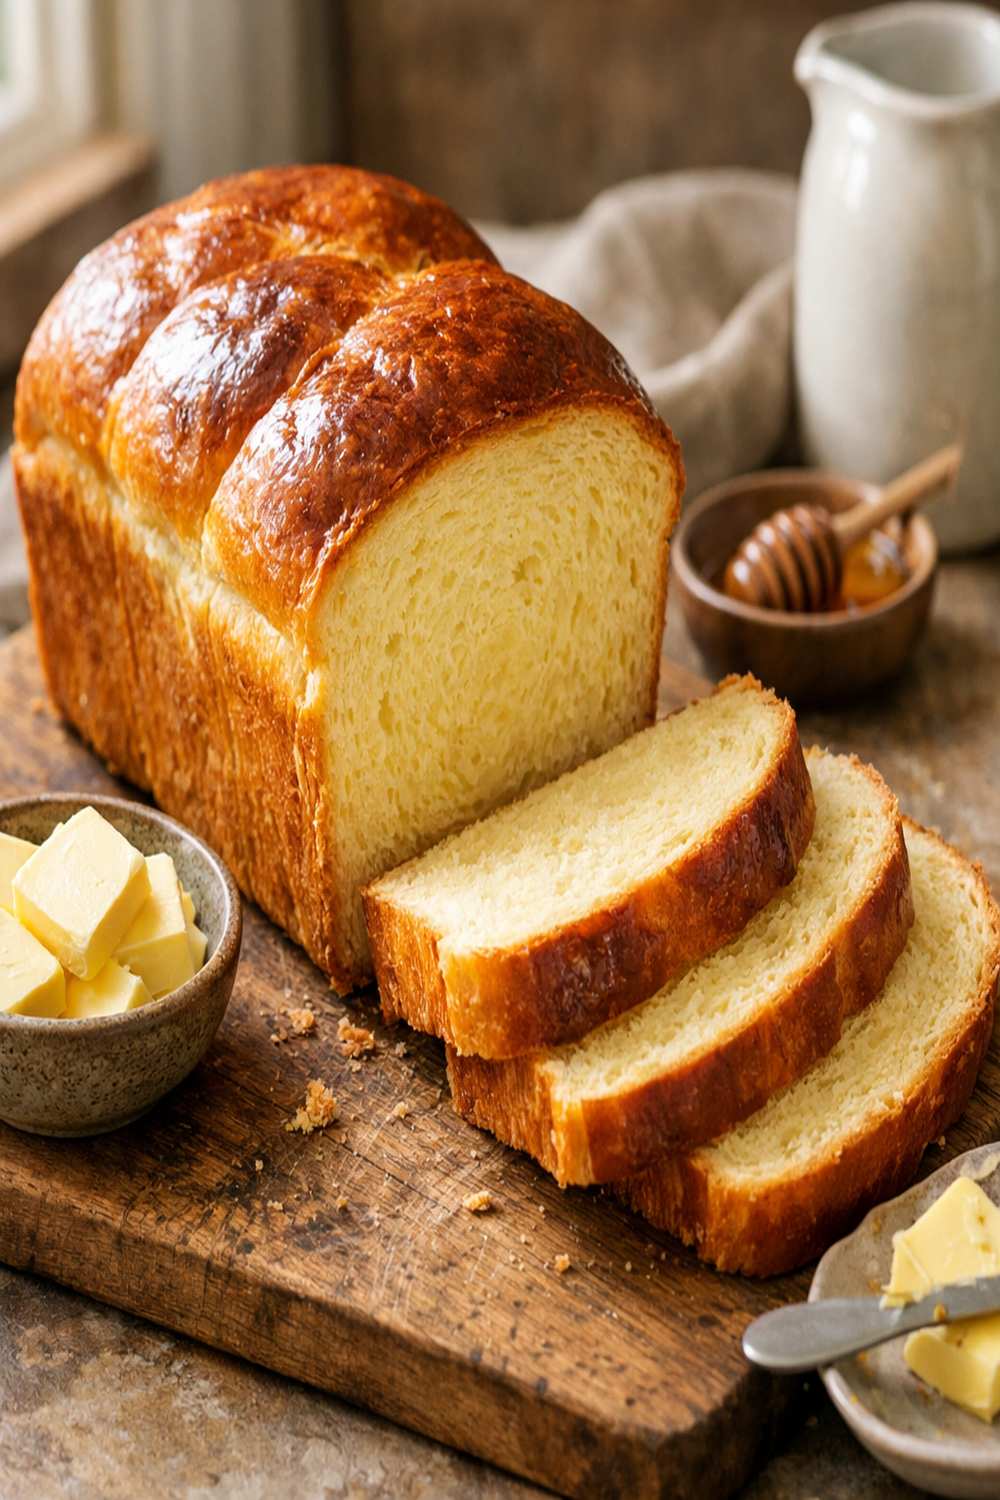
- Place your brioche in the preheated 375-degree oven. Bake for 35-45 minutes, until the top is deep golden brown and the internal temperature reaches 190-195 degrees Fahrenheit when measured with an instant-read thermometer inserted into the center (not touching the pan). If your brioche is browning too quickly on top, tent it loosely with foil for the last 10-15 minutes of baking. All dietary versions bake at the same temperature and time—the structure is stable enough that substitutions don't affect baking time significantly.
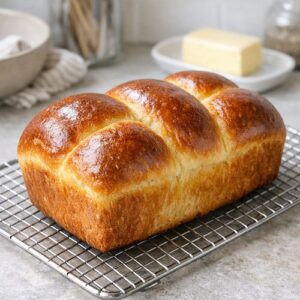
Step 10: Cool (Patience Rewarded)
- Remove your brioche from the oven and let it cool in the pan for 10 minutes. Turn it out onto a wire cooling rack and let it cool completely—at least 1-2 hours—before slicing. I know the aroma will be torture, but slicing warm brioche tears the crumb structure. Wait. Your patience will be rewarded with perfect slices.