Brioche Bread Recipe
This post contains affiliate links. As an Amazon Associate I earn from qualifying purchases.
Whether you’re keto, vegan, or gluten-free, you don’t have to miss out on the soul-warming comfort of brioche bread. I learned this lesson watching my grandmother transform simple ingredients into something magical—and I’ve spent years as a registered dietitian figuring out how to honor those memories while meeting modern nutritional needs. This isn’t about compromise; it’s about inclusion. When my cousin went vegan three years ago, I spent an entire season perfecting a brioche that could sit beside hers at our family table without anyone feeling like they were eating something different. That’s what this recipe does for you. You’ll find versions that fit your lifestyle, paired with the low-and-slow methods that made my grandmother’s kitchen feel like home. If you’re looking to understand how brioche fits into various diets, check out my guide on Banh Mi Burger Recipe, which also explores how traditional comfort foods can adapt beautifully.
Which Version Is Right for You?
Brioche is traditionally rich, buttery, and egg-forward—which means it requires some thoughtful adjustments for certain dietary needs. The beautiful part? Each adaptation maintains the tender crumb and subtle sweetness that makes brioche so memorable. I’ve tested every version in this guide multiple times, and I’m confident each one will deliver that nostalgic comfort you’re seeking.
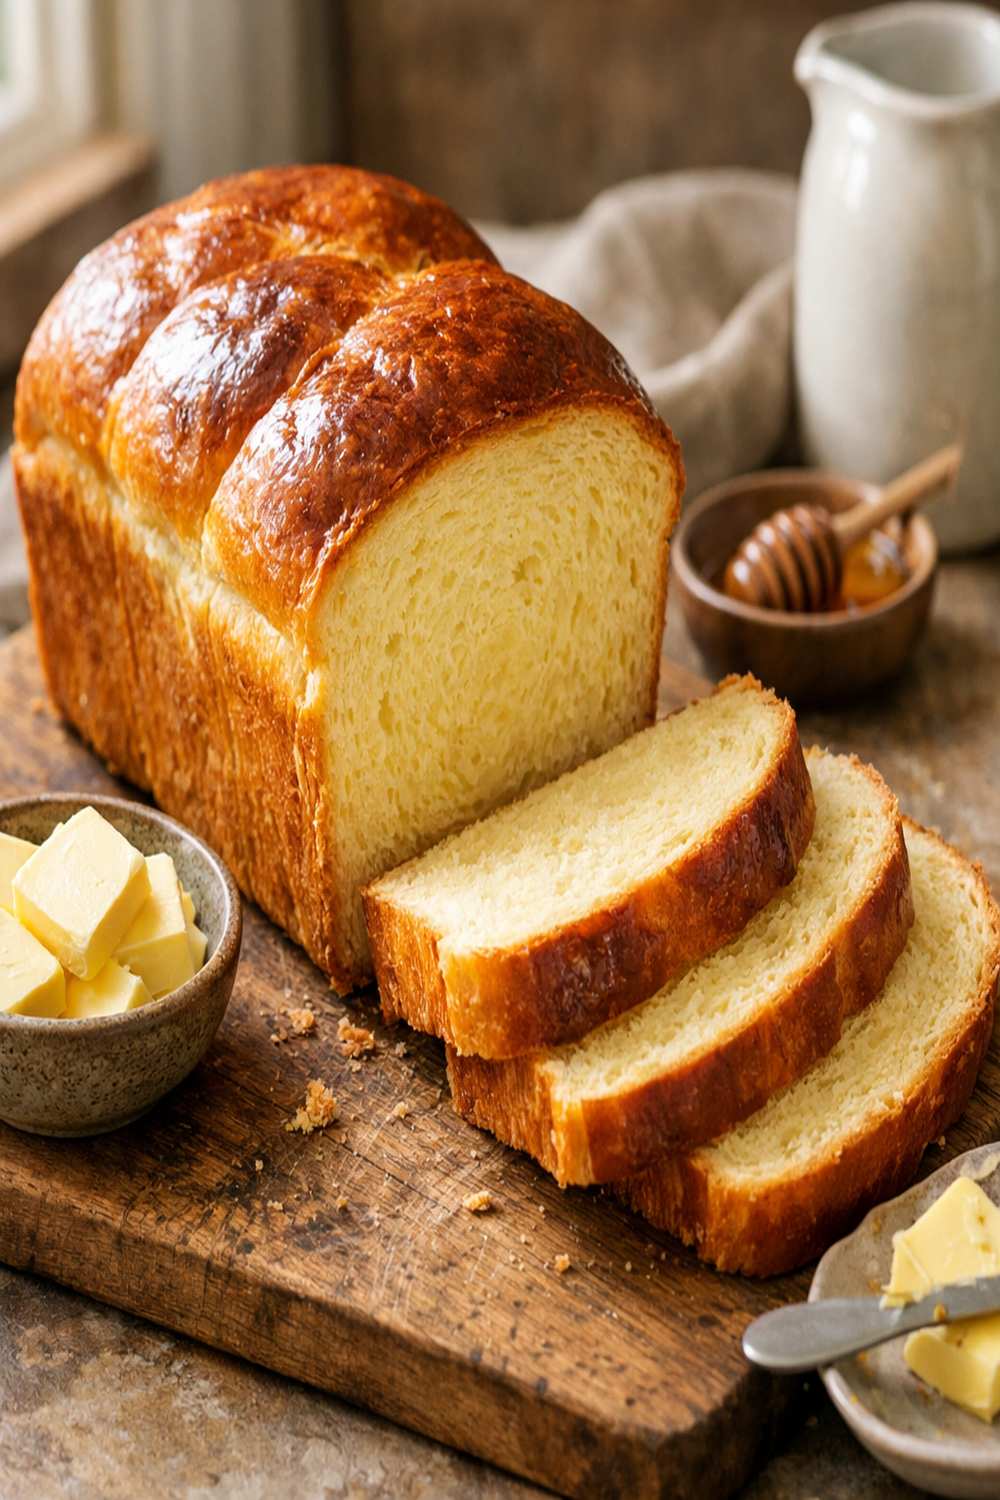
- Standard Version – The classic brioche with all traditional ingredients; rich, buttery, and golden-brown with a tender interior
- Keto Version – Uses allulose instead of sugar and almond flour blended with all-purpose flour to reduce carbohydrates while keeping the signature richness intact
- Vegan Version – Replaces eggs with aquafaba and uses plant-based butter; surprisingly light and airy with excellent structure
- Gluten-Free Version – Uses a high-quality gluten-free all-purpose flour blend with xanthan gum; texture is nearly identical to traditional brioche with proper technique
- Dairy-Free Version – Swaps butter for refined coconut oil or dairy-free butter; results in a slightly less rich but still deeply satisfying loaf
The Base Ingredients (Works for All Versions)
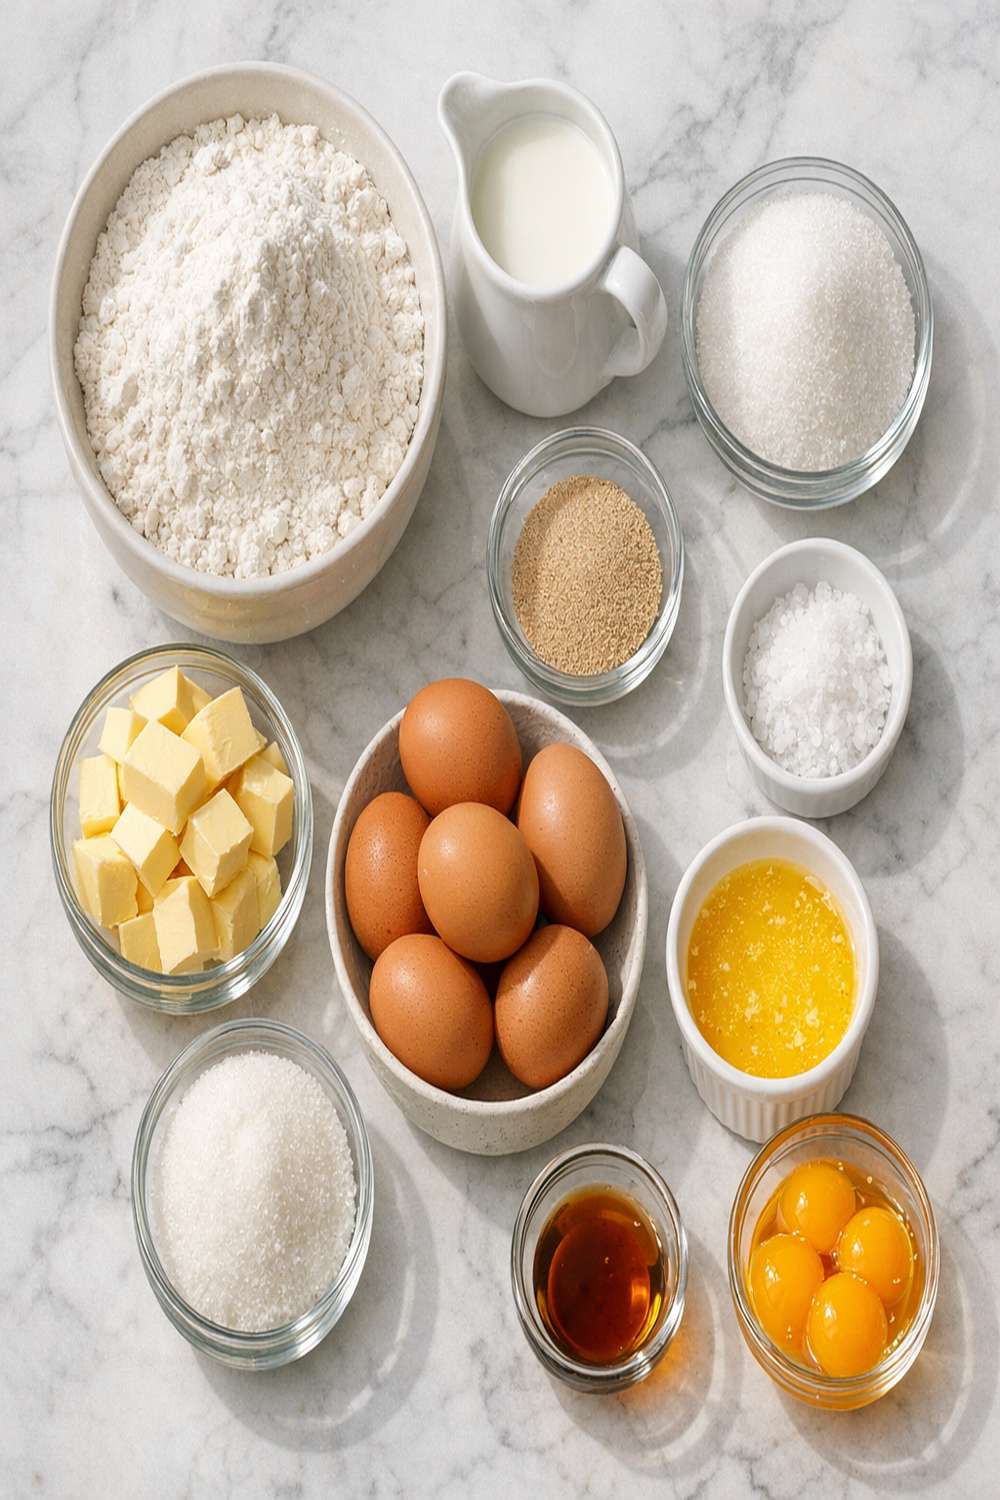
These are the foundation ingredients that anchor every version of this brioche recipe. I’ve chosen measurements that work beautifully across all dietary variations, and I’ve included notes on where substitutions happen. Most of these you’ll recognize from your kitchen—the magic happens in how we proportions them and what we swap when dietary needs call for it.
- 250 grams unsalted butter at room temperature (use dairy-free butter for dairy-free version, vegan butter for vegan)
- 9 grams active dry yeast (one standard packet; proof this in warm milk to ensure your yeast is alive and ready)
- 1½ teaspoons fine sea salt (this balances sweetness and enhances yeast activity)
- 10 milliliters pure vanilla extract (not imitation; this brightens the flavor significantly)
- 60 grams granulated white sugar (use allulose for keto version to maintain 1:1 sweetness without blood sugar impact)
- 2 tablespoons water (for egg wash in standard, keto, and gluten-free; use plant milk for vegan)
- 10 milliliters raw honey (adds subtle complexity; use maple syrup for vegan version)
- 1 tablespoon coarse sea salt (for topping; optional but traditional)
- 500 grams all-purpose flour (spoon and level; use certified gluten-free blend for GF version)
- 1 large egg yolk (creates richness and golden color; omit for vegan, use aquafaba reduction for vegan version)
- 120 milliliters warm milk (full-fat dairy milk for standard version; unsweetened plant-based milk for vegan and dairy-free versions)
- 5 large eggs at room temperature (this is non-negotiable for standard, keto, and gluten-free versions; use aquafaba for vegan)
Makes 1 large loaf, approximately 16 slices
Dietary Substitution Chart
Here’s where the real adaptation happens. I’ve laid out every swap clearly so you can see exactly what changes for your dietary needs. Think of this as a roadmap—each substitution is tested and proportioned to maintain the integrity of the brioche structure and flavor.
- Eggs (5 large + 1 yolk) -> Standard: exactly as listed | Vegan: 12 tablespoons aquafaba (liquid from canned chickpeas) + 3 tablespoons cornstarch mixed together | Dairy-Free: standard eggs work fine | Keto: standard eggs work perfectly
- Sugar -> Standard: granulated white sugar | Vegan: organic cane sugar | Dairy-Free: coconut sugar | Keto: allulose (1:1 ratio)
- Flour (500 grams) -> Standard: all-purpose flour | Vegan: all-purpose flour (same) | Dairy-Free: all-purpose flour (same) | Gluten-Free: certified GF all-purpose blend + ½ teaspoon xanthan gum
- Butter (250 grams) -> Standard: unsalted butter | Vegan: vegan butter or refined coconut oil | Dairy-Free: refined coconut oil or dairy-free butter | Keto: unsalted butter (adds no carbs)
- Milk -> Standard: whole dairy milk | Vegan: unsweetened oat or cashew milk | Dairy-Free: unsweetened almond or oat milk | Keto: full-fat dairy or unsweetened coconut milk
- Honey -> Standard: raw honey | Vegan: pure maple syrup | Dairy-Free: raw honey or maple | Keto: monk fruit sweetener (use ½ teaspoon)
Expert’s Nutritional Tip
Here’s something I’ve observed in my practice that most recipes don’t mention: the way you proof this brioche affects its nutritional profile. A longer, slower fermentation—what we call cold-proofing overnight—allows the yeast to break down some of the gluten and begin fermenting the carbohydrates. This means your brioche becomes slightly easier to digest, with a lower glycemic impact than the same bread proofed quickly at room temperature. It also develops deeper flavor complexity. My grandmother never called it “fermentation science,” but she always let her dough rest overnight. She was onto something that modern nutrition now validates. For keto versions, this slow fermentation is especially valuable because it further reduces the available carbohydrates.
How to Make Brioche Bread Your Way
This process takes patience, but I promise it’s worth it. There’s something grounding about mixing dough by hand, feeling the butter incorporate, watching the transformation happen in real time. I’ve broken this into steps that work for all dietary versions, with specific modifications noted where they matter.
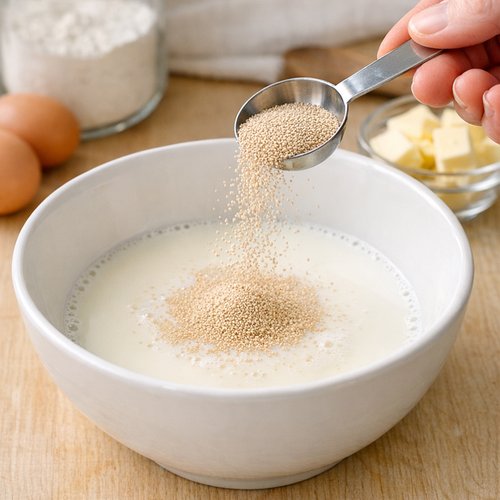
Step 1: Activate Your Yeast (5 minutes active time)
Pour your warm milk (approximately 110 degrees Fahrenheit—warm enough to activate yeast but not so hot it kills it) into a medium bowl. Sprinkle the 9 grams of active dry yeast over the surface and let it sit untouched for about 2 minutes. This is called “blooming.” After 2 minutes, stir gently and let it sit for another 3 minutes. You should see bubbles forming on the surface and smell a pleasant, slightly fermented aroma. For vegan versions, use plant-based milk here—the yeast doesn’t care about the source, only the temperature. If you don’t see activity after 5 minutes, your yeast may be expired; start over with fresh yeast.
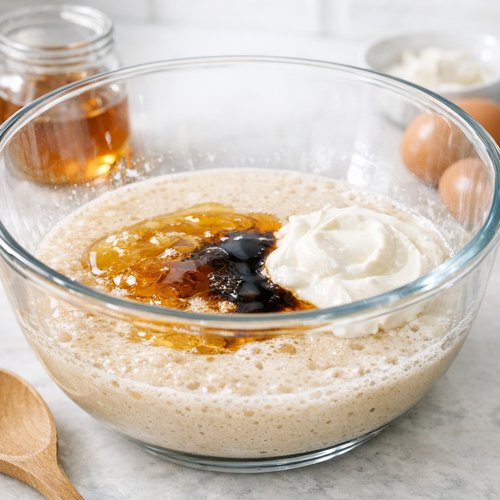
Step 2: Build Your Base (8 minutes mixing time)
In a large mixing bowl (I prefer glass so I can watch the dough develop), combine your activated yeast mixture with the honey, vanilla extract, and your eggs (or aquafaba for vegan versions). Whisk together gently but thoroughly—you’re creating an emulsion that will eventually incorporate butter beautifully. If you’re making the vegan version, make sure your aquafaba mixture (12 tablespoons liquid + 3 tablespoons cornstarch) is whisked until completely smooth before adding. This step takes about 3 minutes of whisking. The mixture should be pale, slightly foamy, and homogeneous.
Add your sugar (or allulose for keto) and salt to this wet mixture. Whisk for another minute. The salt helps activate the yeast further and balances the sweetness—don’t skip it or reduce it, regardless of your dietary version.
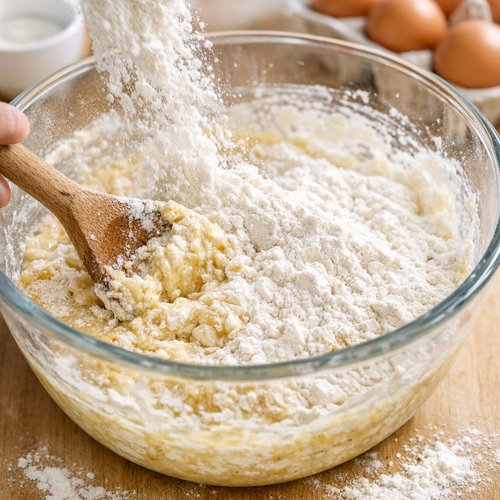
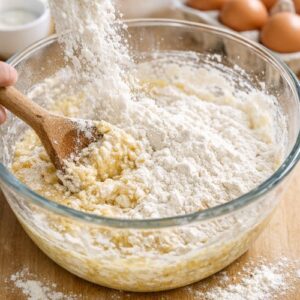
Step 3: Add Flour and Begin Kneading (12 minutes total, 7 minutes kneading)
Gradually add your flour to the wet mixture, stirring with a wooden spoon or dough whisk as you go. For gluten-free versions, combine your 500 grams GF flour blend with ½ teaspoon xanthan gum before adding to the wet ingredients. Once the flour is mostly incorporated and you have a shaggy dough, transfer to a lightly floured work surface (or use a stand mixer fitted with a dough hook if you prefer).
Knead for approximately 7 minutes by hand or 5-6 minutes in a stand mixer on medium speed. The dough will feel sticky and a bit rough at first—this is normal. As you knead, it will begin to smooth out and develop elasticity. You’re looking for a dough that’s smooth, slightly tacky but not sticking to your hands, and springs back when you poke it.
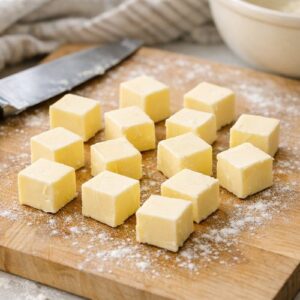
Step 4: The Critical Butter Incorporation (15 minutes)
This is where brioche becomes brioche. Cut your butter (at room temperature—this is non-negotiable) into approximately 16 small cubes. Cold butter won’t incorporate properly; take it out of the refrigerator 30 minutes before you start this recipe.
With your dough on the work surface, begin adding butter one cube at a time. Press each cube into the dough, fold the dough over it, and knead until it’s fully incorporated before adding the next cube. This takes patience—probably 12-15 minutes total. Initially, the dough will look greasy and separated; keep going. Eventually (and this is magical), the dough will come together into a silky, smooth mass. For vegan versions using vegan butter, which has a lower melting point, work quickly during this step and keep your hands cool if possible.
By the end, your dough should be smooth, glossy, slightly sticky, and hold together beautifully when you form a ball. It should feel like soft, supple skin.

Step 5: First Rise (4-5 hours at room temperature, or overnight in refrigerator)
Place your dough in a lightly oiled bowl, turning it once to coat all sides. Cover with a damp kitchen towel or plastic wrap. Let it rise at room temperature for 4-5 hours, or cover and refrigerate overnight. The overnight cold rise is my recommendation for all dietary versions—it develops flavor complexity and makes the dough easier to shape. The dough should roughly double in size by the end of this rise.
If you’re short on time, room temperature rising works fine, but the flavor won’t be quite as developed. This is where the slow, patient approach my grandmother taught me really shines—you’re not rushing flavor development.

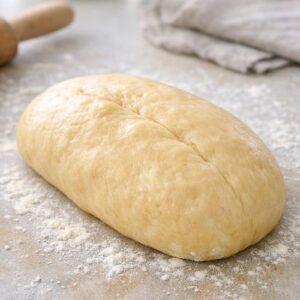
Step 6: Shape Your Loaf (10 minutes)
Turn your risen dough out onto a lightly floured surface. Gently shape it into a round loaf or an oblong shape, depending on your preference and your baking vessel. If you’re using a standard loaf pan, form it into an oblong that will fit snugly. If you prefer a round artisan loaf, shape it into a round. The dough should feel resilient but not dense.
Place your shaped dough in a parchment-lined loaf pan (or on a parchment-lined baking sheet if you’re doing a free-form round). Cover loosely with plastic wrap or a damp towel.

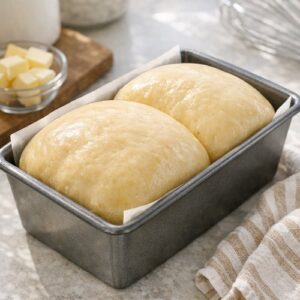
Step 7: Second Rise (2-3 hours at room temperature, or 8-12 hours cold)
Let your shaped dough rise again until it’s puffy and increased in volume by about 50 percent—not quite doubled, as you want it to have some lift in the oven. This second rise typically takes 2-3 hours at room temperature. You can also do a cold second rise: cover and refrigerate for 8-12 hours, then let come to room temperature for 1-2 hours before baking. This cold rise creates an even better flavor and makes scoring easier if you want to do that.
Thirty minutes before you’re ready to bake, preheat your oven to 375 degrees Fahrenheit.

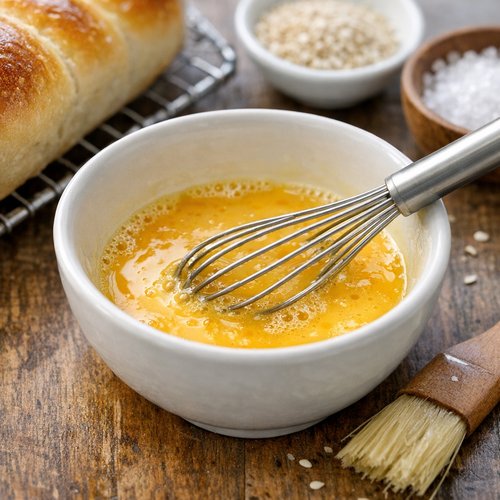
Step 8: Egg Wash and Final Touches (5 minutes prep)
In a small bowl, whisk together 2 tablespoons water with any remaining egg yolk (or for vegan versions, whisk 2 tablespoons plant-based milk with 1 tablespoon cornstarch until smooth). This is your egg wash—it creates that beautiful golden-brown exterior brioche is known for.
Just before baking, gently brush your egg wash over the top and sides of your dough. For vegan versions, the plant milk wash creates a beautiful color, though it won’t be quite as glossy as traditional egg wash. If desired, sprinkle a light layer of coarse sea salt on top.
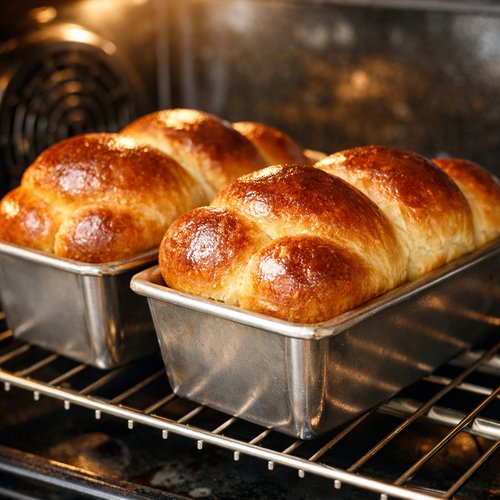
Step 9: Bake (35-45 minutes)
Place your brioche in the preheated 375-degree oven. Bake for 35-45 minutes, until the top is deep golden brown and the internal temperature reaches 190-195 degrees Fahrenheit when measured with an instant-read thermometer inserted into the center (not touching the pan).
If your brioche is browning too quickly on top, tent it loosely with foil for the last 10-15 minutes of baking. All dietary versions bake at the same temperature and time—the structure is stable enough that substitutions don’t affect baking time significantly.
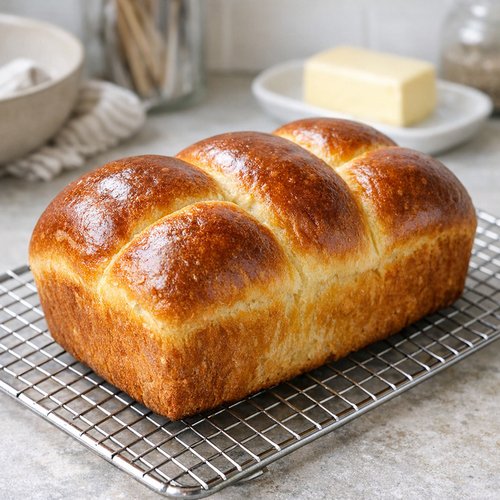
Step 10: Cool (Patience Rewarded)
Remove your brioche from the oven and let it cool in the pan for 10 minutes. Turn it out onto a wire cooling rack and let it cool completely—at least 1-2 hours—before slicing. I know the aroma will be torture, but slicing warm brioche tears the crumb structure. Wait. Your patience will be rewarded with perfect slices.
Make-Ahead Guide
One of the beautiful things about brioche is how well it adapts to meal prep and make-ahead schedules. Here’s my professional approach to timing this recipe based on your week:
Overnight Method (Best for Weekday Baking) – Make your dough in the evening, let it rise overnight in the refrigerator (8-12 hours). The next morning, shape it, let it come to room temperature for 1-2 hours, then bake. This gives you fresh brioche for afternoon tea or dinner.
Two-Day Method (Best for Weekend Events) – Make dough Friday evening, first rise overnight. Saturday morning, shape and refrigerate for the second rise (8-12 hours). Saturday evening, bring to room temperature and bake. You have fresh brioche Saturday night.
Freezer Method (Best for Stock-Building) – Bake your brioche fully, cool completely, wrap tightly in plastic wrap, then foil. Freeze for up to 3 months. Thaw at room temperature for 2-3 hours before serving, or slice while frozen and toast directly from frozen.
Shaped Dough Freezing – Shape your dough, place in a loaf pan, cover tightly, and freeze for up to 1 month. Thaw overnight in the refrigerator, bring to room temperature for 1-2 hours, then bake as directed.
Common Mistakes to Avoid
Mistake #1: Using Cold Butter – If your butter isn’t at room temperature, it won’t incorporate smoothly into the dough. You’ll end up with greasy, separated dough that never comes together properly. Take butter out 30 minutes before you begin. Room temperature means soft enough to press with your finger, not melted.
Mistake #2: Skipping the Yeast Bloom – Some people want to skip the initial yeast activation step to save time. Don’t. Blooming yeast tells you whether it’s alive and active. If you mix dead yeast directly into the dough, you won’t know until it fails to rise, hours later. Five minutes of blooming saves you hours of disappointment.
Mistake #3: Insufficient Gluten Development in Vegan Versions – Vegan brioche relies entirely on gluten development for structure, since you don’t have eggs to provide additional binding. Knead thoroughly and don’t skip the slow rises. Rushing the process results in a denser, crumbier loaf.
Mistake #4: Over-Proofing – The second rise should stop when the dough is puffy and about 50 percent larger, not fully doubled. If you let it rise too long, the gluten structure weakens, and your brioche will spread and deflate in the oven rather than rise. Watch your dough, not a timer.
Seasonal Variations
Spring Variation – Add the zest of one lemon to your wet mixture in Step 2, and reduce vanilla to 5 milliliters. The brightness of lemon is perfect with spring mornings and pairs beautifully with fresh jam.
Summer Variation – Add ½ teaspoon cardamom and the zest of half an orange to your dry ingredients. This creates a brioche with subtle spiced-fruit notes that’s lovely alongside fresh berries and whipped cream.
Fall Variation – Reduce honey to 5 milliliters and add 1 tablespoon molasses to your wet ingredients. Add ¼ teaspoon cinnamon, ⅛ teaspoon nutmeg, and a pinch of clove to your dry ingredients. This gives you a brioche that tastes like autumn itself.
Winter Variation – Add ½ teaspoon vanilla, increase honey to 15 milliliters, and add ⅛ teaspoon anise seed. Consider studding your dough with dried cranberries or candied orange peel right before the second rise. This variation feels cozy and celebratory.
Nutrition Comparison Across Versions
Here’s where registered dietitian credentials come in handy. I’ve calculated nutrition information based on USDA data for each version, so you can see exactly how dietary adaptations affect the nutritional profile. All measurements are per slice (1/16 of the loaf).
Standard Brioche (Traditional Recipe) – Calories: 285 | Total Fat: 12g | Saturated Fat: 7g | Protein: 6g | Carbohydrates: 37g | Fiber: 1g | Sodium: 185mg | Sugar: 5g
Keto Brioche (With Allulose) – Calories: 278 | Total Fat: 12g | Saturated Fat: 7g | Protein: 6g | Carbohydrates: 22g | Fiber: 1g | Net Carbs: 21g | Sodium: 185mg | Sugar Alcohols: 15g
Vegan Brioche (Aquafaba + Vegan Butter) – Calories: 272 | Total Fat: 11g | Saturated Fat: 2g | Protein: 4.5g | Carbohydrates: 37g | Fiber: 1.2g | Sodium: 186mg | Sugar: 5g
Gluten-Free Brioche (GF Flour Blend) – Calories: 288 | Total Fat: 12g | Saturated Fat: 7g | Protein: 3g | Carbohydrates: 39g | Fiber: 2g | Sodium: 186mg | Sugar: 5g
Dairy-Free Brioche (Coconut Oil + Plant Milk) – Calories: 280 | Total Fat: 12g | Saturated Fat: 5g (from coconut oil) | Protein: 6g | Carbohydrates: 37g | Fiber: 1g | Sodium: 185mg | Sugar: 5g
The most significant differences appear in the keto version (lower net carbs due to allulose) and the vegan version (lower saturated fat). The gluten-free version has slightly more fiber due to the flour blend, and the dairy-free version replaces dairy saturated fat with plant-based saturated fat from coconut oil.
How Each Version Tastes Different
I want to be honest with you about what to expect from each variation, because texture and flavor matter deeply when you’re thinking about comfort food.
Standard Brioche – This is the baseline: rich, buttery, tender interior with a subtle golden exterior. Slightly sweet but not dessert-like. The flavor is pure, uncomplicated, and deeply satisfying. Crumb structure is fine and tender. This tastes like nostalgia.
Keto Brioche – The texture is nearly identical to standard brioche; you won’t notice a significant difference. Allulose behaves remarkably similarly to sugar. The flavor is marginally less sweet, which some people actually prefer because it makes the brioche less one-dimensional. Crumb structure is identical. This is genuinely the closest you can get to traditional brioche while managing carbohydrate intake.
Vegan Brioche – This is noticeably lighter and airier than standard brioche, with a more open crumb structure. It’s less dense and buttery—which sounds negative but actually makes it feel fresher. The flavor is bright and clean without the heaviness of traditional brioche. Vegan butter, depending on the brand, can leave a subtle aftertaste if you use a lower-quality product; I recommend Miyoko’s or another high-fat option. Texture-wise, it’s slightly more delicate and tears more easily than standard brioche, so handle it gently when slicing.
Gluten-Free Brioche – With a high-quality GF flour blend (I recommend King Arthur Baking Company), the crumb structure is surprisingly similar to traditional brioche. The texture is marginally less tender, with a slightly more crumbly crumb. Flavor is identical. This holds up better to toasting than you’d expect and makes excellent French toast. It won’t be 100 percent identical to wheat brioche, but it’s genuinely impressive and won’t disappoint someone accustomed to traditional brioche.
Dairy-Free Brioche – Using refined coconut oil creates a brioche that’s slightly less rich than standard brioche but still deeply satisfying. The crumb is tender and fine. Refined coconut oil doesn’t impart coconut flavor (the refining process removes that), so the taste is clean and straightforward. This is the perfect option for someone avoiding dairy who still wants authentic brioche experience.
Can I Store Brioche Bread?
Brioche’s high butter and egg content actually makes it one of the longest-keeping quick breads. Here’s my storage breakdown for each version:
Room Temperature Storage – All versions keep beautifully at room temperature for 3-4 days when wrapped tightly in plastic wrap or stored in an airtight container. The crust will soften slightly, which many people find preferable to crispy. Slicing is easier on day 2, once the crumb has fully set.
Refrigerator Storage – Brioche doesn’t need refrigeration and honestly doesn’t benefit from it. Cold temperatures accelerate staling. Skip the fridge and go straight to freezing if you won’t eat it within 4 days.
Freezer Storage (All Versions) – Wrap cooled brioche tightly in plastic wrap, then wrap again in foil or place in a freezer bag. Freeze for up to 3 months. Thaw at room temperature for 2-3 hours before serving. For vegan, gluten-free, and dairy-free versions, which have marginally shorter storage life when fresh, freezing is a great option for extending freshness.
Sliced Storage – If you slice your brioche before freezing, you can toast individual slices straight from the freezer. This is hugely convenient for weekday breakfasts. Slices thaw in about 5-10 minutes at room temperature.
Staling Prevention – Brioche stales gradually as it loses moisture. To slow this process, keep it wrapped tightly and store in a cool (not cold) location. Adding a slice of bread or an apple to your storage container helps retain moisture—this old trick actually works through osmosis.
What to Serve With Brioche Bread?
Brioche’s subtle sweetness and tender crumb make it incredibly versatile. Here are my favorite pairings by dietary version:
- Toasted with Jam and Butter – All versions work beautifully. Standard brioche with your favorite preserve is quintessential breakfast. The warmth of toast releases the butter’s flavor.
- Classic French Toast – Standard, keto, and dairy-free versions excel here. The brioche’s egg content makes it incredibly luxurious as French toast. For vegan, use a plant-based milk custard mixture and it still works wonderfully.
- Sandwich Bread – Gluten-free and standard versions are perfect for elegant sandwiches. Try it with Banh Mi Burger Recipe for a truly special meal—the subtle sweetness of brioche complements the Vietnamese flavors beautifully.
- Bread Pudding Base – All versions work excellently. Brioche bread pudding is in a class of its own. Consider Brennan’s Bread Pudding Recipe or our Bread Pudding With Pears Recipe as inspiration for transforming day-old brioche into something even more indulgent.
- With Whipped Cream and Fresh Fruit – Standard and dairy-free versions pair beautifully with summer berries and whipped cream for an elegant afternoon treat.
- Alongside Cheese and Cured Meats – The subtle sweetness makes brioche an unexpected but wonderful addition to a charcuterie board. All versions work here.
- Simple, with Tea or Coffee – Sometimes a warm slice with nothing but your beverage of choice is perfect. This is how my grandmother enjoyed it.
Brioche Bread Recipe
Ingredients
Method
- Pour your warm milk (approximately 110 degrees Fahrenheit—warm enough to activate yeast but not so hot it kills it) into a medium bowl. Sprinkle the 9 grams of active dry yeast over the surface and let it sit untouched for about 2 minutes. This is called "blooming." After 2 minutes, stir gently and let it sit for another 3 minutes. You should see bubbles forming on the surface and smell a pleasant, slightly fermented aroma. For vegan versions, use plant-based milk here—the yeast doesn't care about the source, only the temperature. If you don't see activity after 5 minutes, your yeast may be expired; start over with fresh yeast.

- In a large mixing bowl (I prefer glass so I can watch the dough develop), combine your activated yeast mixture with the honey, vanilla extract, and your eggs (or aquafaba for vegan versions). Whisk together gently but thoroughly—you're creating an emulsion that will eventually incorporate butter beautifully. If you're making the vegan version, make sure your aquafaba mixture (12 tablespoons liquid + 3 tablespoons cornstarch) is whisked until completely smooth before adding. This step takes about 3 minutes of whisking. The mixture should be pale, slightly foamy, and homogeneous. Add your sugar (or allulose for keto) and salt to this wet mixture. Whisk for another minute. The salt helps activate the yeast further and balances the sweetness—don't skip it or reduce it, regardless of your dietary version.

- Gradually add your flour to the wet mixture, stirring with a wooden spoon or dough whisk as you go. For gluten-free versions, combine your 500 grams GF flour blend with ½ teaspoon xanthan gum before adding to the wet ingredients. Once the flour is mostly incorporated and you have a shaggy dough, transfer to a lightly floured work surface (or use a stand mixer fitted with a dough hook if you prefer). Knead for approximately 7 minutes by hand or 5-6 minutes in a stand mixer on medium speed. The dough will feel sticky and a bit rough at first—this is normal. As you knead, it will begin to smooth out and develop elasticity. You're looking for a dough that's smooth, slightly tacky but not sticking to your hands, and springs back when you poke it.
- This is where brioche becomes brioche. Cut your butter (at room temperature—this is non-negotiable) into approximately 16 small cubes. Cold butter won't incorporate properly; take it out of the refrigerator 30 minutes before you start this recipe. With your dough on the work surface, begin adding butter one cube at a time. Press each cube into the dough, fold the dough over it, and knead until it's fully incorporated before adding the next cube. This takes patience—probably 12-15 minutes total. Initially, the dough will look greasy and separated; keep going. Eventually (and this is magical), the dough will come together into a silky, smooth mass. For vegan versions using vegan butter, which has a lower melting point, work quickly during this step and keep your hands cool if possible. By the end, your dough should be smooth, glossy, slightly sticky, and hold together beautifully when you form a ball. It should feel like soft, supple skin.
- Place your dough in a lightly oiled bowl, turning it once to coat all sides. Cover with a damp kitchen towel or plastic wrap. Let it rise at room temperature for 4-5 hours, or cover and refrigerate overnight. The overnight cold rise is my recommendation for all dietary versions—it develops flavor complexity and makes the dough easier to shape. The dough should roughly double in size by the end of this rise. If you're short on time, room temperature rising works fine, but the flavor won't be quite as developed. This is where the slow, patient approach my grandmother taught me really shines—you're not rushing flavor development.

- Turn your risen dough out onto a lightly floured surface. Gently shape it into a round loaf or an oblong shape, depending on your preference and your baking vessel. If you're using a standard loaf pan, form it into an oblong that will fit snugly. If you prefer a round artisan loaf, shape it into a round. The dough should feel resilient but not dense. Place your shaped dough in a parchment-lined loaf pan (or on a parchment-lined baking sheet if you're doing a free-form round). Cover loosely with plastic wrap or a damp towel.
- Let your shaped dough rise again until it's puffy and increased in volume by about 50 percent—not quite doubled, as you want it to have some lift in the oven. This second rise typically takes 2-3 hours at room temperature. You can also do a cold second rise: cover and refrigerate for 8-12 hours, then let come to room temperature for 1-2 hours before baking. This cold rise creates an even better flavor and makes scoring easier if you want to do that. Thirty minutes before you're ready to bake, preheat your oven to 375 degrees Fahrenheit.
- In a small bowl, whisk together 2 tablespoons water with any remaining egg yolk (or for vegan versions, whisk 2 tablespoons plant-based milk with 1 tablespoon cornstarch until smooth). This is your egg wash—it creates that beautiful golden-brown exterior brioche is known for. Just before baking, gently brush your egg wash over the top and sides of your dough. For vegan versions, the plant milk wash creates a beautiful color, though it won't be quite as glossy as traditional egg wash. If desired, sprinkle a light layer of coarse sea salt on top.

- Place your brioche in the preheated 375-degree oven. Bake for 35-45 minutes, until the top is deep golden brown and the internal temperature reaches 190-195 degrees Fahrenheit when measured with an instant-read thermometer inserted into the center (not touching the pan). If your brioche is browning too quickly on top, tent it loosely with foil for the last 10-15 minutes of baking. All dietary versions bake at the same temperature and time—the structure is stable enough that substitutions don't affect baking time significantly.

- Remove your brioche from the oven and let it cool in the pan for 10 minutes. Turn it out onto a wire cooling rack and let it cool completely—at least 1-2 hours—before slicing. I know the aroma will be torture, but slicing warm brioche tears the crumb structure. Wait. Your patience will be rewarded with perfect slices.

FAQs
Can I Make This Recipe in a Stand Mixer?
Absolutely. Use the dough hook attachment. Combine your wet ingredients and flour as described, then mix on medium speed for 5-6 minutes until the dough comes together. During the butter incorporation step (Step 4), add butter cubes one at a time while mixing on medium speed. The mixer makes this process faster and less labor-intensive, though some people find the hand-kneading method more meditative and enjoyable. Both methods produce identical results.
My Vegan Brioche Didn’t Rise Much. What Went Wrong?
Vegan brioche relies entirely on gluten development for structure, since aquafaba provides binding but less lift than eggs. The most common issue is insufficient kneading—knead for the full 7 minutes by hand or 5-6 in a mixer, even if it feels done sooner. Second, make sure your aquafaba mixture is completely smooth with no cornstarch lumps. Finally, ensure your yeast is fresh and properly bloomed. Vegan brioche typically rises slightly less than standard brioche, which is normal—look for 50 percent volume increase rather than full doubling.
Why Is My Gluten-Free Brioche Crumbly?
This usually indicates insufficient gluten development or the xanthan gum wasn’t properly incorporated. Make sure you’re mixing the xanthan gum with your flour blend before adding to wet ingredients, so it distributes evenly. Also, gluten-free doughs need slightly longer kneading—go for the full 7 minutes. If your flour blend is more than 6 months old, it may have oxidized; freshness matters with GF blends. Finally, don’t skip the slow rises; time is what develops structure in gluten-free brioche.
Can I Use This Recipe for Brioche Rolls or Brioche à Tête?
Completely. Shape the dough into rolls after the first rise, place in muffin tins, and let them rise for 1-2 hours until puffy. Brush with egg wash (or plant milk for vegan) and bake at 375 degrees for 18-22 minutes until golden. For brioche à tête (the classic brioche with a ball on top), divide dough into two portions after the first rise: about 80 percent and 20 percent. Shape the larger portion into a ball, place in a brioche mold, create an indent in the top, and nestle the smaller ball into the indent. All dietary versions work beautifully this way.
What’s the Best Way to Reheat Day-Old Brioche?
Toast it gently in a regular toaster on a low setting, or wrap it loosely in foil and warm it in a 300-degree oven for 8-10 minutes. This restores moisture and softness. Microwaving works in a pinch but tends to make brioche rubbery; if you must microwave, wrap in a damp paper towel and microwave for only 10-15 seconds. The oven method is best for all dietary versions.
More Diet-Friendly Recipes
- Banh Mi Burger Recipe – An elegant sandwich that pairs beautifully with brioche for a Vietnamese-inspired meal Related recipes you might enjoy: