Butternut Squash Pie Recipe
This post contains affiliate links. As an Amazon Associate I earn from qualifying purchases.
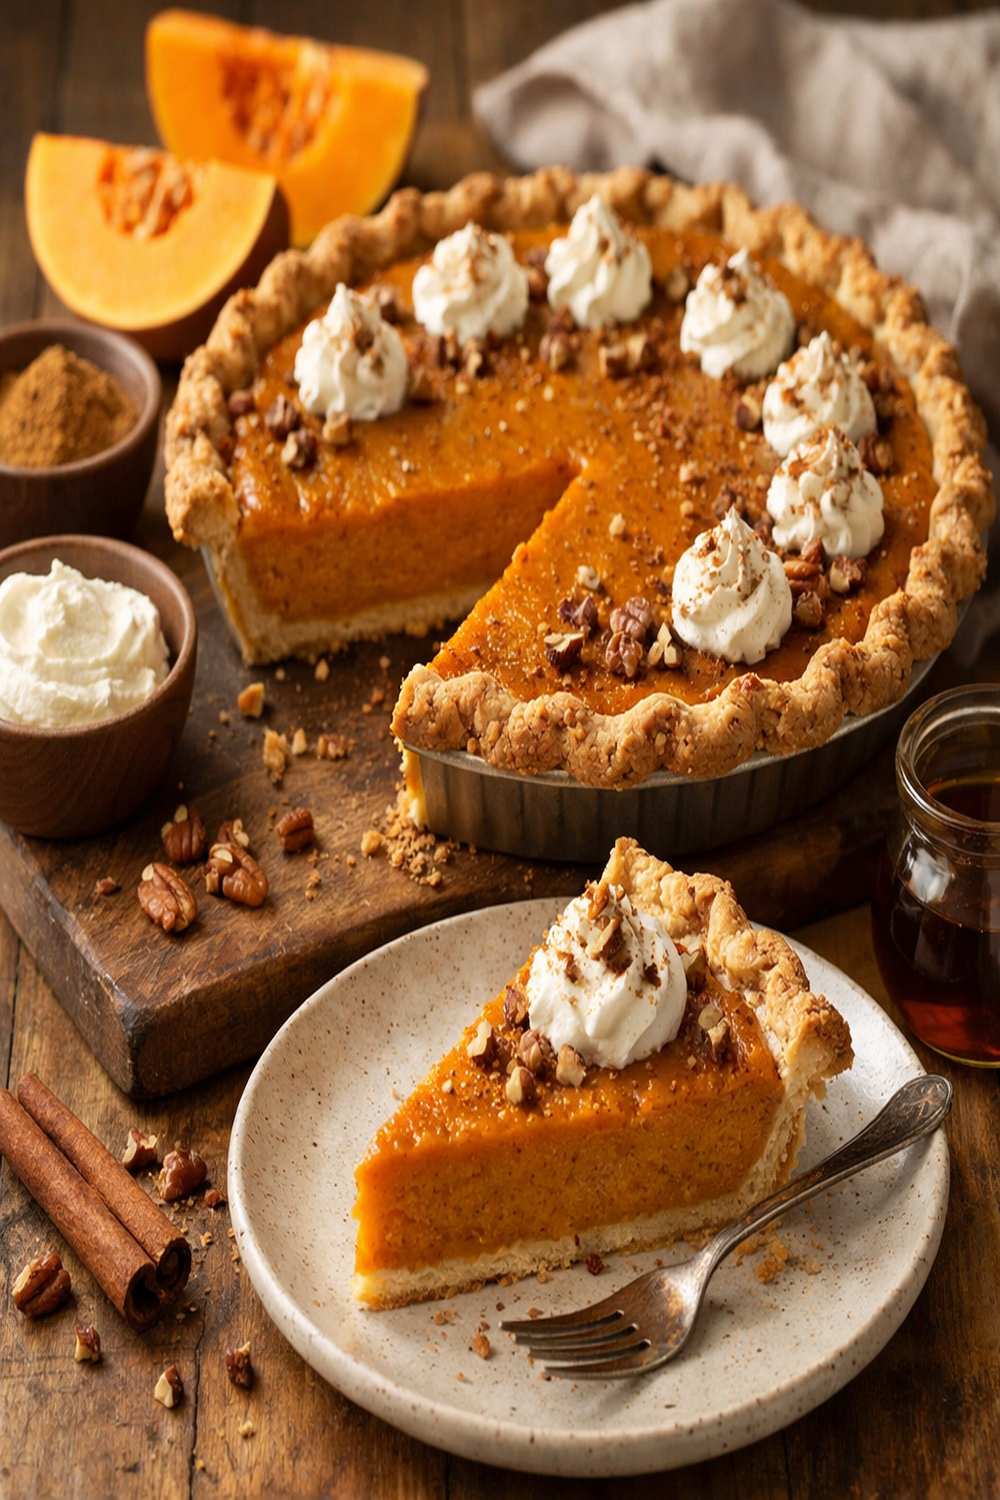
This butternut squash pie doesn’t just taste incredible—it stops people in their tracks. The moment you pull it from the oven, golden-brown and fragrant with warming spices, you’re serving something that nourishes both body and soul. As a registered dietitian here in Worcester, I’ve spent years learning how to honor the traditions my grandmother taught me while ensuring every bite delivers real nutritional value. This butternut squash pie recipe is exactly that—a bridge between generations, between comfort and wellness, between a humble autumn gourd and pure magic on a plate.
How a Single Pie Taught Me That Food Is Memory
I was eight years old when my grandmother first let me help her make butternut squash pie. She didn’t have fancy equipment or trendy ingredients. What she had was patience, a sharp knife, and hands that knew exactly how to coax sweetness and creaminess from that bumpy orange squash sitting on her kitchen counter. She’d cut the squash in half with a methodical saw-like motion, scrape out the seeds (which she’d save and roast), and slide those halves into the oven with the same care you’d handle a sleeping infant.
But here’s what I remember most: the smell. Not just the pie itself, but the moment those roasted squash halves emerged—the caramelized edges, the deepened color, the way the kitchen seemed to exhale sweetness. My grandmother would let me scoop the soft flesh into a bowl, and she’d smile at my concentration like I was doing the most important work in the world.
Decades later, as I studied nutrition science and learned about beta-carotene, fiber, and the anti-inflammatory compounds in cinnamon and nutmeg, I realized something: my grandmother was practicing medicine without knowing it. She was creating healing food, one slow-roasted pie at a time. That’s what I want to share with you today—not just a recipe, but a reminder that traditional comfort food and genuine nutrition aren’t opposites. They’re partners.
Why This Butternut Squash Pie Recipe Changed How I Think About Autumn Baking
Most butternut squash pies follow the same tired formula: rush the preparation, dump ingredients into a crust, and hope for the best. This recipe is different because it honors the ingredient. When you give that squash 45 to 60 minutes of low-and-slow roasting, something remarkable happens. The natural sugars concentrate. The flesh becomes creamy without needing excessive cream or eggs. The flavor deepens from mild and watery to rich and complex.
I’m not exaggerating when I say the first time I made this pie using my grandmother’s low-and-slow method—instead of my younger, rushed self’s approach—my entire family fell silent for a moment after their first bite. My sister literally put her fork down and said, “Willie, what did you do differently?” The answer was simple: I slowed down. I let the squash become itself before I did anything else with it.
That moment crystallized something for me professionally. As a dietitian, I spend my days helping people understand that nutrition isn’t about restriction or trend-chasing. It’s about choosing whole ingredients, respecting their integrity, and giving them the time and care they deserve. This pie embodies that philosophy in every spoonful.
The Nutritional Powerhouse Hidden in Your Pie Slice
Before we talk technique, let me share what makes butternut squash nutritionally remarkable. According to USDA data, a single cup of roasted butternut squash delivers over 450% of your daily vitamin A needs (in the form of beta-carotene), nearly 25% of your daily potassium, and significant amounts of vitamin C and B vitamins. That orange color isn’t just beautiful—it’s a visual promise of antioxidant power.
The spices we’re using aren’t just flavor agents. Cinnamon has been shown in research to help with blood sugar regulation and may reduce inflammation. Nutmeg contains compounds that support digestion and may have mild anti-inflammatory effects. This pie, when enjoyed in reasonable portions, is a functional food in the truest sense.
What I appreciate most about this recipe is that it achieves richness and satisfaction through ingredient quality and cooking method, not through excessive sugar or heavy cream. The evaporated milk creates that silky texture while keeping the overall fat and calorie content moderate compared to traditional recipes.
Choosing Your Ingredients Like You’re Selecting Heirlooms
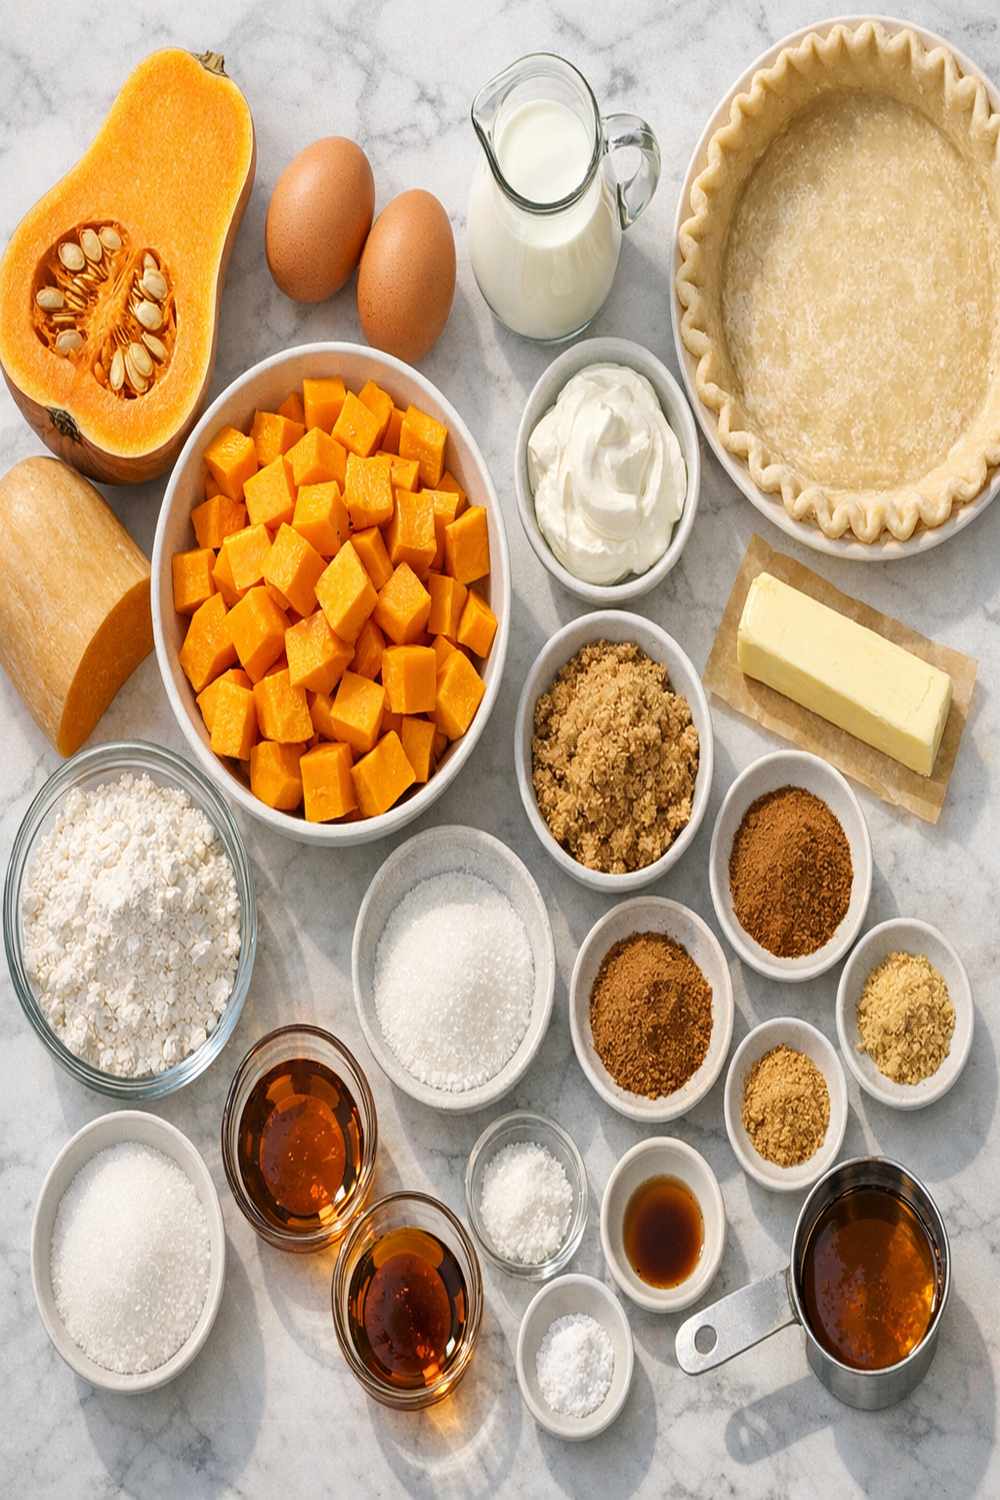
Every ingredient in this pie serves a purpose. I’ve selected them not just for flavor, but for how they work together to create a finished dish that’s both deeply satisfying and genuinely nourishing. When you’re shopping, treat this ingredient list like you’re selecting treasures—because you are.
For the Filling
- ¼ cup granulated sugar (balances the molasses notes)
- 2 teaspoons pure vanilla extract, not imitation (the flavor difference is profound)
- 2 large eggs, room temperature (these bind and create the custard structure)
- 3 to 4 pounds fresh butternut squash, whole and unblemished (the thicker-walled specimens have sweeter, less watery flesh)
- ½ cup light brown sugar, packed (molasses adds depth beyond simple sweetness)
- 2 tablespoons unsalted butter (added to the puree for richness without overwhelm)
- 1 cup evaporated milk, full-fat (creates silkiness while keeping added liquid moderate)
For Seasoning and Structure
- 1 nine-inch pie crust in its tin, thawed but not pre-baked (room temperature works best)
- ¼ teaspoon freshly grated nutmeg (fresh-grated is incomparably better than pre-ground)
- 1 teaspoon ground cinnamon (preferably Ceylon, which has a sweeter profile than cassia)
- 1 tablespoon honey (optional, for brushing the crust edges to encourage deeper browning)
- 3 tablespoons cornstarch (thickens the filling without making it dense)
- ¼ teaspoon fine sea salt (amplifies all the other flavors)
Yield: Makes one 9-inch pie, serving 8 to 10 people comfortably, with room for seconds.
Expert’s Nutritional Insight: Why We’re Not Using Canned Squash
I know canned butternut squash exists, and I know it’s convenient. But here’s what I’ve learned through my work as a dietitian: the roasting process does something remarkable to the nutritional profile. When you roast squash slowly, you increase the bioavailability of beta-carotene—meaning your body can actually absorb and use more of those beneficial compounds. Additionally, fresh roasted squash has a water content that’s been partially reduced, concentrating flavors and nutrients naturally. Canned versions often have added sugars and sodium that throw off the balance of this recipe. When we’re honoring both tradition and nutrition, fresh roasted is the only path that makes sense.
How to Make This Butternut Squash Pie Recipe: A Slow Meditation
This isn’t a recipe to rush. Set aside an afternoon. Put on music. Let yourself slow down alongside the squash. This process takes about two and a half hours from start to finish, but most of that is passive oven time where you can do other things. What matters is that you’re not hurrying the stages that matter.
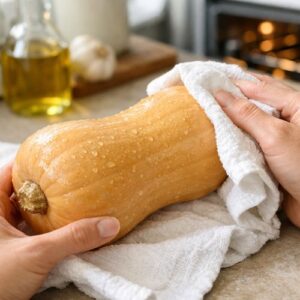
Step 1: Prepare and Roast Your Squash Low and Slow
Preheat your oven to 375 degrees Fahrenheit. While it’s warming, wash your butternut squash under cool running water and pat it completely dry. A damp squash won’t roast properly. Take a sharp chef’s knife and carefully slice the squash lengthwise, cutting straight through the stem end. This takes some pressure—take your time and keep your hands clear of the blade’s path. Scoop out all the seeds and stringy bits with a sturdy spoon or melon baller. (Save those seeds if you like—they roast beautifully with a little salt and oil.)
Lightly grease a rimmed baking sheet with butter or neutral oil. Place both squash halves cut-side down on the sheet. This is important: the cut side down allows the natural sugars to caramelize against the hot pan while the skin protects the delicate flesh from drying out. Slide into the oven and roast for 45 to 60 minutes, depending on the size and thickness of your squash. You’ll know it’s ready when a fork easily pierces the flesh and the edges have taken on a light golden-brown color. This roasting time is non-negotiable—it’s where the magic happens.

Step 2: Cool and Transform Into Silken Puree
Remove the baking sheet from the oven and let those beautiful roasted halves rest for at least 30 minutes. This cooling period is important for two reasons: first, it makes the squash safe to handle, and second, the cooling allows the starches to set slightly, making the flesh easier to scoop and process. The squash should still be warm but not actively steaming.
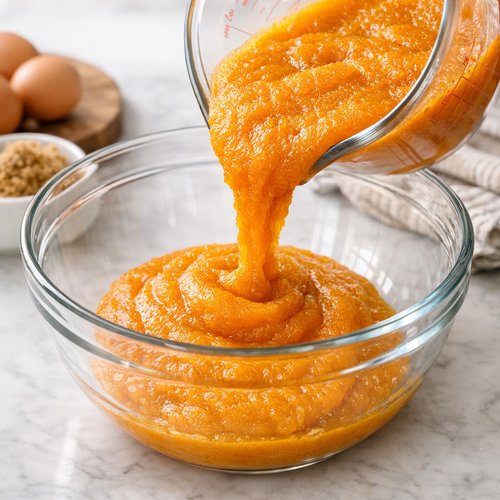
Once cooled enough to handle, use a sturdy spoon to scoop the soft flesh away from the skin into a food processor. You’re looking to capture all the caramelized goodness clinging to the inside of that skin. Discard the skin. Add the 2 tablespoons of butter to the food processor with the warm squash. Blend on high speed for about 5 minutes, stopping occasionally to scrape down the sides. What you’re creating here is pure velvet—a puree so smooth it practically pours.

Step 3: Build Your Custard Foundation
Pour exactly 2 cups of your butternut squash puree into a large mixing bowl. (Any extra can be refrigerated for soups or roasted vegetable dishes.) To this puree, add your 2 room-temperature eggs, the cup of evaporated milk, the ½ cup of packed light brown sugar, the ¼ cup of granulated sugar, and 2 teaspoons of vanilla extract. Using a whisk or wooden spoon, stir everything together until well combined. The mixture should look creamy and unified, with no streaks of brown sugar remaining.
This is the moment where you’re building the custard that will be the structural and textural heart of your pie. Those eggs will set the filling. The milk creates silkiness. The sugars provide both sweetness and help with the custard’s texture through their hygroscopic properties (they attract and hold moisture).
Step 4: Season With Purpose and Intention
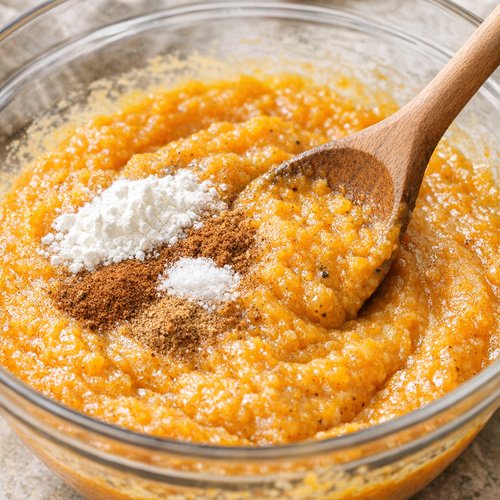
Now add your cornstarch, cinnamon, salt, and nutmeg to the same bowl. Stir gently but thoroughly until the spices are evenly distributed and no streaks of cornstarch remain. This step is crucial—a patch of concentrated cinnamon or an undissolved bit of cornstarch can create texture problems or flavor imbalances in your finished pie. I like to stir in one direction, scraping the bottom frequently, for about one minute. You want uniformity.
Taste a tiny spoonful. It should smell like autumn in a bowl—warm, sweet, and gently spiced. Adjust spices now if needed, though this is rarely necessary if you’re using fresh spices.
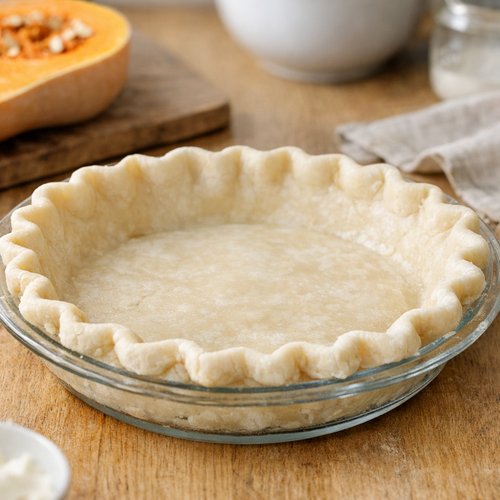
Step 5: Prepare Your Crust With Care
Remove your pie crust from the freezer and let it sit at room temperature for about 10 minutes. You want it flexible enough to work with but still cold enough to maintain its structure. Using a rolling pin, gently roll out the crust to about ⅛-inch thickness, working on a lightly floured surface. Transfer it carefully to your 9-inch pie tin, letting it settle naturally into the corners and up the sides.
Trim the excess dough to about 1 inch beyond the rim, then fold that overhang under itself to create a thick edge. At this point, you can crimp the edge decoratively with your fingers or a fork—this detail adds visual interest and helps the edge brown beautifully. If you’d like, brush the edge lightly with that optional tablespoon of honey diluted with a few drops of water. This encourages deep, even browning.
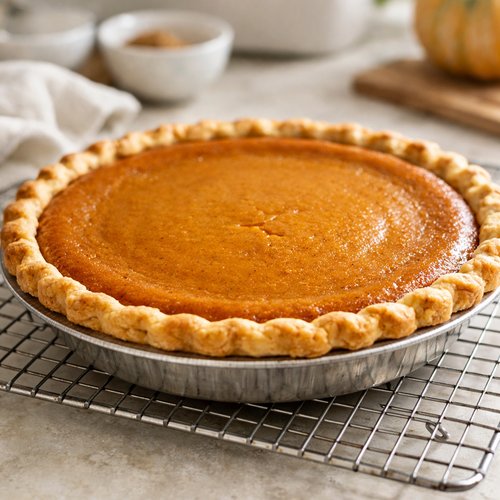
Step 6: Fill and Bake to Golden Perfection
Pour your prepared filling into the unbaked crust. Pour slowly and deliberately, filling until the mixture reaches about ¼ inch from the rim of the crust. (You may not need every drop—it’s better to be slightly under than to risk overflow, which creates a mess and burns on your oven floor.) Slide the filled pie into your 375-degree oven.
Bake for 45 minutes to 1 hour. The pie is done when the crust is a beautiful golden brown and the filling is set around the edges but still has a very slight jiggle—about the consistency of soft custard—in the center when you gently shake the pan. That tiny wobble indicates a perfectly set custard that won’t crack or become rubbery. If the crust edges are browning too quickly, cover them loosely with aluminum foil or a pie crust shield for the final 15 to 20 minutes.

Step 7: Cool With Patience (The Hardest Step)
Remove the pie from the oven and place it on a wire cooling rack. This is the moment where you have to exercise real restraint. Let that pie cool at room temperature for at least one full hour before you even think about slicing it. I know it smells incredible. I know you want to eat it immediately. But this cooling period allows the custard to set completely. A pie sliced too warm will fall apart and weep its filling everywhere. A properly cooled pie will slice cleanly and hold its shape beautifully on the plate.
After that first hour at room temperature, you can transfer the pie to the refrigerator if you’d like to serve it chilled. Chilled pie has a different, luxurious texture that some people prefer. I find both room temperature and chilled versions equally wonderful—choose based on your preference and the season.
Make-Ahead Guide: Smart Planning for Stress-Free Baking
One of my favorite things about this recipe is how well it accommodates advance preparation. Here’s my professional make-ahead strategy:
Up to 3 days ahead: Roast and puree your butternut squash. Store the puree in an airtight container in the refrigerator. The flavor actually improves slightly as the roasted squash sits, and you’ll have one major task completed when you need it most.
Up to 2 days ahead: Prepare your entire filling mixture, cover it with plastic wrap pressed directly onto the surface, and refrigerate. When you’re ready to bake, simply give it a stir and pour it into your crust. This is a game-changer for holiday entertaining.
Up to 1 day ahead: Assemble your pie completely (filled crust, ready to bake), cover loosely with plastic wrap, and refrigerate. When you’re ready to bake, add 5 to 10 minutes to the baking time since you’re starting with a cold filling. This method is excellent if you want the pie fresh on serving day but don’t want to be in the kitchen during party prep.
Baked pie storage: Covered tightly in the refrigerator, this pie keeps beautifully for 4 to 5 days. The flavor actually becomes more integrated and mellow as it sits. You can serve it straight from the cold refrigerator, or let slices come to room temperature for about 15 minutes before serving.
Common Mistakes I See (And How to Avoid Them)
Mistake #1: Rushing the Roasting. I see people try to roast squash at higher temperatures to save time. This backfires consistently. High heat cooks the outside before the inside is tender, or it dries out the flesh. The low-and-slow 375-degree method is not negotiable. It’s not just about texture—it’s about flavor development and nutrient concentration.
Mistake #2: Using Pre-Ground Spices That Have Lost Their Power. Cinnamon and nutmeg are volatile compounds. Once ground, they begin to oxidize and lose potency. I’ve had students bring me pies that tasted more like sweet squash than spiced autumn magic because they were using spices that had been sitting open in the cabinet for two years. Buy whole nutmeg and grate it fresh. Buy cinnamon sticks or fresh-ground cinnamon from a bulk spice source. Your pie will be incomparably better.
Mistake #3: Opening the Oven Door Constantly to Check Progress. Every time you open that oven door, you disrupt the heat and humidity balance inside. This extends cooking time and can lead to uneven baking. Trust the timing. Look through the oven window instead of opening the door. At the 40-minute mark, take one quick look to assess browning, but that’s it.
Mistake #4: Slicing Too Warm. I know I mentioned this in the instructions, but it bears repeating because it’s the most common reason people think they’ve failed. A pie that sits for 60 minutes will slice beautifully. A pie that’s sliced at 30 minutes will fall apart. This is non-negotiable. Set a timer. Use that hour to set your table, make whipped topping, and build anticipation.
Serving Suggestions: The Perfect Companions
Butternut squash pie is magnificent on its own, but the right accompaniment elevates the entire experience. Serve it with unsweetened whipped cream that you’ve whipped yourself with just a touch of vanilla extract. The coolness and slight tartness of good whipped cream is the perfect counterpoint to the warm, sweet pie. Alternatively, a scoop of vanilla ice cream melting into warm pie is absolute comfort.
Some people love a drizzle of salted caramel sauce, which brings out the natural sweetness of the squash while adding complexity. Others prefer a light dusting of fleur de sel and ground cinnamon just before serving—a beautiful nod to the spices within.
For coffee pairing, this pie is sublime. The spices and squash complement coffee’s bitterness beautifully. For tea, a good loose-leaf cinnamon or ginger tea makes an excellent match.
Seasonal Variations: How to Evolve This Recipe Throughout the Year
Fall/Winter (September through December): This is the canonical version—embrace the cinnamon, nutmeg, and warming spices. Add a pinch of ground ginger if you like. Serve with spiced whipped cream.
Spring (March through May): Reduce the warming spices slightly (use ¾ teaspoon cinnamon instead of 1, omit the nutmeg or reduce to ⅛ teaspoon). Add ¼ teaspoon of freshly grated cardamom and a hint of lemon zest. Serve with honey-sweetened whipped cream and candied lemon peel.
Summer (June through August): Transform this into a chilled pie by serving it completely cold with a touch of whipped coconut cream instead of dairy whipped cream. Add ½ teaspoon of vanilla and a pinch of sea salt to your squash puree, reduce the spices to nearly nothing, and serve with fresh berries on the side. It becomes a completely different dessert—lighter and more refreshing while still maintaining its identity.
Light Variation Year-Round: If you’re watching your added sugar, you can reduce the brown sugar to ⅓ cup and the granulated sugar to 2 tablespoons, substituting a tablespoon of pure maple syrup. The pie won’t be as sweet, but the spices will shine through even more clearly, and the natural sweetness of the roasted squash becomes the star.
Can I Store Butternut Squash Pie? The Complete Storage Guide
Absolutely, and it stores remarkably well. At room temperature: Cover your pie loosely with a kitchen towel and keep it on the counter for up to 8 hours. This is ideal if you’ve just made it and plan to serve it the same day.
In the refrigerator: Cover the pie tightly with plastic wrap, pressing it directly onto any exposed filling surface to prevent it from drying out. Your pie will keep beautifully for 4 to 5 days. In fact, some people prefer it after a day in the refrigerator—the flavors integrate and the texture becomes creamier and more custard-like. Slice and serve cold, or let slices come to room temperature for about 15 minutes.
In the freezer: You can freeze the entire unbaked pie (after filling it) for up to 3 months. There’s no need to thaw—simply add 10 to 15 minutes to your baking time and check for doneness as directed. A baked pie also freezes well for up to 3 months, though I prefer to freeze it unbaked for the best texture. Thaw in the refrigerator overnight before serving if you’ve frozen a baked pie.
The key to successful storage is preventing the filling from drying out. That plastic wrap pressed directly onto the surface is your best friend.
Nutrition Information
Per serving (based on 8 servings per pie): approximately 310 calories, 12 grams total fat, 6 grams saturated fat, 35 grams carbohydrates, 3 grams fiber, 18 grams sugar (including added sugars), 4 grams protein, and 580 milligrams sodium.
From a nutritional standpoint, here’s what matters: Each serving delivers approximately 280% of your daily vitamin A needs (from the butternut squash), 15% of your daily potassium, and meaningful amounts of vitamins C and B vitamins. The fiber content supports digestive health and helps moderate blood sugar response. The cinnamon and nutmeg provide polyphenols—plant compounds with antioxidant and anti-inflammatory properties.
What I appreciate about this pie nutritionally is the balance. Yes, it contains added sugars—you can taste that this is a dessert. But the overall sugar load is reasonable for a dessert portion, the fiber helps moderate blood sugar impact, and the nutrient density is genuinely impressive. This is a dessert you can feel good about serving to people you love.
According to USDA nutritional data, butternut squash is one of the most nutrient-dense vegetables available. Its beta-carotene content is nearly identical to carrots, but squash provides additional nutrients like potassium (important for heart health), manganese (critical for bone health and metabolism), and various B vitamins. When you serve this pie, you’re serving something that’s delicious and genuinely nourishing.
What to Serve Alongside for a Complete Visual and Culinary Spread
If you’re building a dessert course or a fall gathering, think about the complete plate experience. Butternut squash pie creates a warm, golden aesthetic. Surround it with complementary flavors and visual elements:
- Vanilla bean whipped cream – the contrast between cold cream and warm pie is textural perfection, and visually, the white provides elegant contrast to the golden pie
- Candied pecans or walnuts – adds crunch, visual depth with amber tones, and nutty flavor notes that echo the spices in the pie
- A simple green salad with citrus vinaigrette – sounds odd, but the brightness cuts through the richness beautifully and adds visual freshness to an autumn plate
- Roasted apple slices or poached pears – doubles down on the fall aesthetic and adds another fruit element without competing for attention
- Microwave sweet potato – if you’re doing a more substantial meal, roasted sweet potato alongside the pie creates a cohesive autumn theme and adds nutritional density
If you’re looking for savory components to anchor a larger gathering, consider starting with something like this cozy soup, which provides a warm, comforting counterpoint before moving to the richness of the pie. The contrast between the light soup and the luxurious pie creates a memorable meal arc.
Butternut Squash Pie Recipe
Ingredients
Method
- Preheat your oven to 375 degrees Fahrenheit. While it's warming, wash your butternut squash under cool running water and pat it completely dry. A damp squash won't roast properly. Take a sharp chef's knife and carefully slice the squash lengthwise, cutting straight through the stem end. This takes some pressure—take your time and keep your hands clear of the blade's path. Scoop out all the seeds and stringy bits with a sturdy spoon or melon baller. (Save those seeds if you like—they roast beautifully with a little salt and oil.) Lightly grease a rimmed baking sheet with butter or neutral oil. Place both squash halves cut-side down on the sheet. This is important: the cut side down allows the natural sugars to caramelize against the hot pan while the skin protects the delicate flesh from drying out. Slide into the oven and roast for 45 to 60 minutes, depending on the size and thickness of your squash. You'll know it's ready when a fork easily pierces the flesh and the edges have taken on a light golden-brown color. This roasting time is non-negotiable—it's where the magic happens.
- Remove the baking sheet from the oven and let those beautiful roasted halves rest for at least 30 minutes. This cooling period is important for two reasons: first, it makes the squash safe to handle, and second, the cooling allows the starches to set slightly, making the flesh easier to scoop and process. The squash should still be warm but not actively steaming. Once cooled enough to handle, use a sturdy spoon to scoop the soft flesh away from the skin into a food processor. You're looking to capture all the caramelized goodness clinging to the inside of that skin. Discard the skin. Add the 2 tablespoons of butter to the food processor with the warm squash. Blend on high speed for about 5 minutes, stopping occasionally to scrape down the sides. What you're creating here is pure velvet—a puree so smooth it practically pours.

- Pour exactly 2 cups of your butternut squash puree into a large mixing bowl. (Any extra can be refrigerated for soups or roasted vegetable dishes.) To this puree, add your 2 room-temperature eggs, the cup of evaporated milk, the ½ cup of packed light brown sugar, the ¼ cup of granulated sugar, and 2 teaspoons of vanilla extract. Using a whisk or wooden spoon, stir everything together until well combined. The mixture should look creamy and unified, with no streaks of brown sugar remaining. This is the moment where you're building the custard that will be the structural and textural heart of your pie. Those eggs will set the filling. The milk creates silkiness. The sugars provide both sweetness and help with the custard's texture through their hygroscopic properties (they attract and hold moisture).

- Now add your cornstarch, cinnamon, salt, and nutmeg to the same bowl. Stir gently but thoroughly until the spices are evenly distributed and no streaks of cornstarch remain. This step is crucial—a patch of concentrated cinnamon or an undissolved bit of cornstarch can create texture problems or flavor imbalances in your finished pie. I like to stir in one direction, scraping the bottom frequently, for about one minute. You want uniformity. Taste a tiny spoonful. It should smell like autumn in a bowl—warm, sweet, and gently spiced. Adjust spices now if needed, though this is rarely necessary if you're using fresh spices.

- Remove your pie crust from the freezer and let it sit at room temperature for about 10 minutes. You want it flexible enough to work with but still cold enough to maintain its structure. Using a rolling pin, gently roll out the crust to about ⅛-inch thickness, working on a lightly floured surface. Transfer it carefully to your 9-inch pie tin, letting it settle naturally into the corners and up the sides. Trim the excess dough to about 1 inch beyond the rim, then fold that overhang under itself to create a thick edge. At this point, you can crimp the edge decoratively with your fingers or a fork—this detail adds visual interest and helps the edge brown beautifully. If you'd like, brush the edge lightly with that optional tablespoon of honey diluted with a few drops of water. This encourages deep, even browning.

- Pour your prepared filling into the unbaked crust. Pour slowly and deliberately, filling until the mixture reaches about ¼ inch from the rim of the crust. (You may not need every drop—it's better to be slightly under than to risk overflow, which creates a mess and burns on your oven floor.) Slide the filled pie into your 375-degree oven. Bake for 45 minutes to 1 hour. The pie is done when the crust is a beautiful golden brown and the filling is set around the edges but still has a very slight jiggle—about the consistency of soft custard—in the center when you gently shake the pan. That tiny wobble indicates a perfectly set custard that won't crack or become rubbery. If the crust edges are browning too quickly, cover them loosely with aluminum foil or a pie crust shield for the final 15 to 20 minutes.

- Remove the pie from the oven and place it on a wire cooling rack. This is the moment where you have to exercise real restraint. Let that pie cool at room temperature for at least one full hour before you even think about slicing it. I know it smells incredible. I know you want to eat it immediately. But this cooling period allows the custard to set completely. A pie sliced too warm will fall apart and weep its filling everywhere. A properly cooled pie will slice cleanly and hold its shape beautifully on the plate. After that first hour at room temperature, you can transfer the pie to the refrigerator if you'd like to serve it chilled. Chilled pie has a different, luxurious texture that some people prefer. I find both room temperature and chilled versions equally wonderful—choose based on your preference and the season.

FAQs About This Butternut Squash Pie Recipe
Can I Use Canned Butternut Squash Puree Instead of Roasting Fresh Squash?
Technically, yes—you’ll get a pie that tastes good. But you’ll lose something meaningful. Roasted fresh squash develops concentrated flavors that canned versions can’t replicate. More importantly, as I mentioned in my nutritional insight section, the roasting process increases nutrient bioavailability. If you absolutely must use canned (and there’s no judgment here—life happens), use the best quality canned butternut puree you can find, drain off any excess liquid, and follow the rest of the recipe. Your pie will still be delicious, just not quite as transcendent.
What If My Pie Is Still Too Jiggly in the Center After the Recommended Baking Time?
Bake for another 10 to 15 minutes and check again. Oven temperatures vary, and larger or deeper pies may need extra time. The key is that slight jiggle in the very center—not a wave, not liquid movement, but a gentle wobble. If the edges are browning too much, tent with foil. You can also lower your oven temperature by 25 degrees for the remaining bake time, which slows the browning while giving the center more time to set.
Can I Make This Pie Without Eggs?
You can try substituting with a flax egg (1 tablespoon ground flaxseed mixed with 3 tablespoons water per egg), but the texture will be different—less custard-like and more cake-like. The pie may also be slightly more delicate. If you’re vegan, I’d recommend this modification, but know that you’re creating a different dessert. Another option is using aquafaba (liquid from canned chickpeas) in a 3-to-1 ratio, which works remarkably well for vegan custard applications.
How Do I Prevent My Pie Crust From Getting Soggy?
This is a common concern with custard pies. A few strategies: First, make sure your crust is completely thawed but still cold when you fill it. Second, you can lightly brush the unbaked crust with egg white before filling (this creates a moisture barrier). Third, don’t prebake your crust—the raw crust has more time to firm up in the oven. Finally, let your filling cool to room temperature before pouring it into the crust if you’re concerned about excessive moisture. Most importantly, make sure your pie is fully baked (that jiggle test is essential) and cooled completely before slicing. A properly baked pie with a good bake time won’t have soggy crust issues.
Can I Make Mini Butternut Squash Pies Instead of One Large Pie?
Absolutely! Fill a muffin tin lined with small pie crust rounds or fill phyllo cups. Bake at 375 degrees for 20 to 25 minutes instead of 45 to 60 minutes. Check them starting at the 20-minute mark—you want that same slight jiggle in the centers. Individual pies are wonderful for portion control and look beautifully elegant on a dessert table. The make-ahead benefits apply here too—you can assemble them in advance and bake when needed.
More Visually Stunning Recipes to Master
- Asian Beef Shank Recipe – a slow-cooked masterpiece that teaches the same low-and-slow philosophy applied to savory cooking
- BBQ Chinese Pork Recipe – another celebration of patience and traditional technique
- Vegetarian Baozi Recipe – beautiful filled dumplings that showcase precision and care
A Final Thought: Feeding Both the Body and the Soul
I started this journey as an eight-year-old watching my grandmother work, not really understanding why she moved so slowly, why she took so much time, why a simple pie required an entire afternoon. Now, as a registered dietitian, I understand that she was honoring something sacred—the intersection of nourishment and love, tradition and science, comfort and wellness.
This butternut squash pie recipe is my way of honoring that lesson. It’s my way of saying that you don’t have to choose between serving something deeply comforting and serving something genuinely nourishing. You don’t have to abandon tradition to eat well. You don’t have to rush to create something meaningful.
When you make this pie, you’re not just baking—you’re participating in a lineage of people who understood that food is medicine, that care is an ingredient, that time spent in the kitchen feeding the people you love is time spent in one of life’s most important practices.
Your grandmother would recognize this pie. Your body will thank you for the nutrients. Your taste buds will sing. And everyone at your table will remember it.
That’s what butternut squash pie is meant to be. That’s what I hope you’ll create in your kitchen soon.
Happy Cooking!