Method
Step 1: Prepare Your Pork Loin with Intention
- Remove your pork loin from the refrigerator and place it on a clean cutting board. Using a sharp chef's knife, slice the meat against the grain into thin strips approximately 3 inches long and about ¼-inch thick. The key here is that you're slicing against the grain—this breaks down the muscle fibers and ensures tenderness. If you slice with the grain, you'll end up with chewy ribs no matter what else you do. Take your time with this step. My grandmother used to say that a knife can be your best friend or your worst enemy, and she was talking about this exact moment. A dull knife will crush the meat; a sharp one will glide through it, preserving the cell structure and ensuring even cooking later.

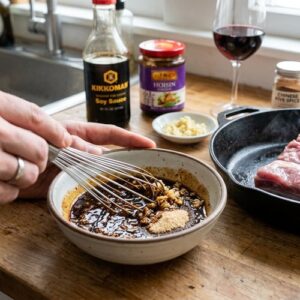
Step 2: Build Your Flavor Foundation
- In a small mixing bowl, combine the soy sauce, hoisin sauce, dry red wine, natural cane sugar, minced garlic, and Chinese Five Spice. Whisk these ingredients together with intention—you're not just mixing, you're emulsifying the oil from the hoisin into the salty liquid of the soy sauce, creating a glaze that will cling to the pork rather than just pool at the bottom of a bag. Whisk until the sugar dissolves completely and the mixture is uniform in color and texture. This usually takes about thirty seconds of vigorous whisking. If you're using the red food coloring, add it now—just two drops create a beautiful mahogany hue without any artificial taste.
Step 3: The Overnight Transformation (Or 4-Hour Shortcut)
- Place your sliced pork loin into a large sealable plastic bag or a glass container if you prefer to avoid plastic. Pour the marinade over the meat, making sure every piece is submerged or well-coated. If you're using a bag, press out as much air as possible before sealing—this ensures the marinade stays in contact with the meat. If you're using a container, stir the mixture so each slice gets coated. Now comes the hardest part: patience. Refrigerate this overnight, or for a minimum of four hours. I know overnight sounds long, but here's what's happening during that time: the salt in the soy sauce is breaking down the muscle proteins, allowing the marinade to penetrate deep into the meat. After just four hours, you'll have decent results. After twelve hours, you'll have something magical.

Step 4: Prepare Your Oven and Baking Surface
- When you're ready to cook, preheat your oven to 350°F. This is a deliberate, moderate temperature—hot enough to cook through and create a gentle caramelization, but not so hot that the exterior burns before the interior cooks. Line a large baking sheet with aluminum foil (for easy cleanup, which matters more than you'd think), and place an oven-safe baking rack on top of the foil. The rack is crucial here because it allows heat to circulate underneath the pork, ensuring even cooking and preventing the bottom from steaming in its own juices.

Step 5: Arrange and Brush with Precision
- Remove the pork from the refrigerator about ten minutes before cooking—this allows the meat to come closer to room temperature, which ensures more even cooking throughout. Pour the marinade into a small bowl, reserving it for basting. Arrange the pork slices on the baking rack in a single layer, leaving a little space between each piece so heat can circulate. Don't crowd the pan—if pieces overlap, they'll steam instead of roast. If necessary, use two baking sheets.

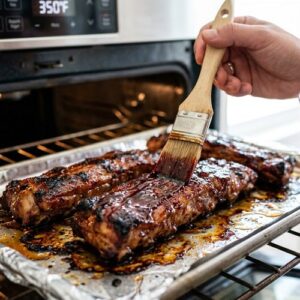
Step 6: The Low-and-Slow Bake with Basting
- Place the baking sheet in the preheated 350°F oven. Set a timer for fifteen minutes. When it goes off, remove the sheet and, using a pastry brush or the back of a spoon, brush each piece of pork with the reserved marinade. Coat generously but don't soak—you want a glossy layer, not a puddle. Return to the oven for another fifteen minutes. Repeat this basting process two more times, for a total cooking time of 40 to 45 minutes. Each time you baste, you're building layers of flavor and creating that signature glossy lacquered finish my grandmother's ribs always had.
Step 7: The Final Crisp
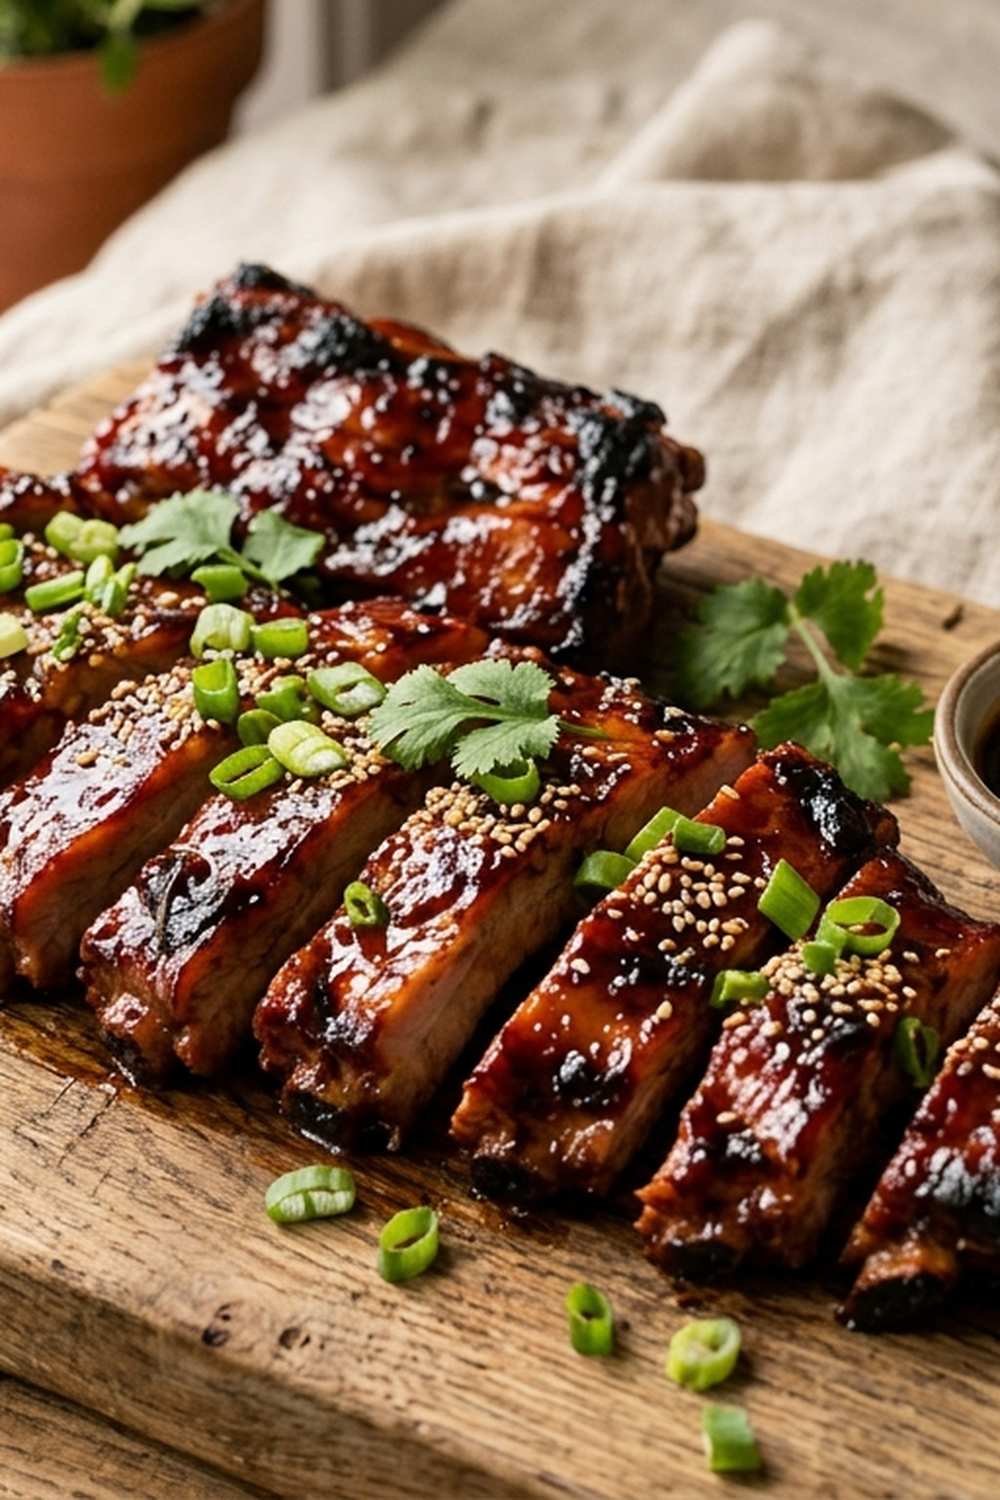
- After 40 to 45 minutes, the pork should be cooked through—it will be pale and beginning to caramelize at the edges. For that final touch of restaurant-quality crust, turn your oven to broil and place the sheet on the rack closest to the heat source. Watch carefully—this is just 1 to 2 minutes, no more. You're aiming for slightly darkened, crispy edges, not charred ribs. Broilers vary dramatically in intensity, so stay close and keep your eyes on them. This final step makes all the difference, transforming the texture from merely tender to genuinely crave-worthy.

Step 8: Rest and Serve
- Remove the sheet from the oven and let the pork rest for three to five minutes. This allows the juices to redistribute throughout the meat, ensuring that when you bite into a piece, it stays moist rather than releasing all its liquid onto your plate. Serve immediately over steamed white rice and alongside steamed vegetables—bok choy, broccoli, or snow peas pair beautifully. The ribs are at their best enjoyed fresh from the oven, when they still have that slight warmth and the marinade has that subtle sticky-glossy quality.