Ingredients
Method
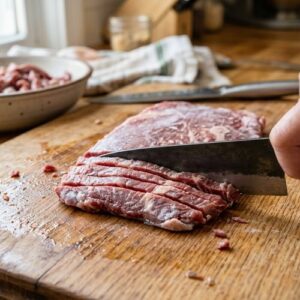
Step 1: Prepare the Beef Through Velveting
- Start with your beef partially frozen—about 45 minutes in the freezer is perfect. This matters more than people realize. When beef is slightly firm, it slices much more cleanly and evenly, which means it'll cook at the same rate and create that uniform, restaurant-quality appearance. Slice against the grain into pieces about 3 inches long and ⅛ to ¼ inch thick. This thickness is crucial; too thin and it falls apart, too thick and it won't tenderize properly. Now here's the magic: velveting. Combine your sliced beef with the water, cornstarch, neutral oil, oyster sauce, Shaoxing wine, and baking soda in a medium bowl. This isn't just a marinade—it's a transformative process. The cornstarch creates a protective coating, the oil begins breaking down the muscle fibers, and that baking soda? It's alkaline, which actually opens up the protein structure, making even tougher cuts (like chuck roast or London broil) impossibly tender. Let this sit for at least 30 minutes, though overnight in the refrigerator is genuinely better, especially for tougher cuts. I always do mine overnight because I plan ahead—one of the secrets to stress-free cooking.
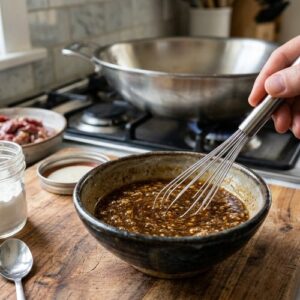
Step 2: Build Your Sauce in Advance
- While your beef marinates, combine all your sauce ingredients in a small bowl: the chicken stock, cornstarch, oyster sauce, Shaoxing wine, light and dark soy sauces, sugar, sesame oil, and white pepper. Whisk this together until the cornstarch is fully dissolved. This step, done in advance, means you're never scrambling during the actual cooking. Set it aside at room temperature. The cornstarch will want to settle, which is fine—you'll stir it again right before adding it to the wok. This is one of my cardinal rules of balanced cooking: mise en place, the French technique of having everything prepared before you begin cooking. It's not just professional habit; it changes everything about how calm and confident you feel in the kitchen.
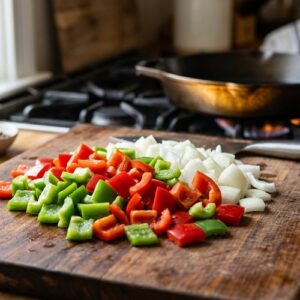
Step 3: Cut Your Vegetables for Even Cooking
- Cut both bell peppers and your onion into roughly 1-inch pieces. The key here is consistency—if some pieces are twice the size of others, they'll cook unevenly, and you'll end up with some vegetables mushy while others are still raw. I usually cut the peppers lengthwise into strips, then cut those strips into chunks. For the onion, I cut it in half first, then slice vertically, creating pieces that stay together a bit better during the high-heat tossing. The visual element matters here too. Uniform pieces not only cook better but also look more intentional and beautiful on the final plate. It's the difference between "homemade" looking and "restaurant-quality" looking.
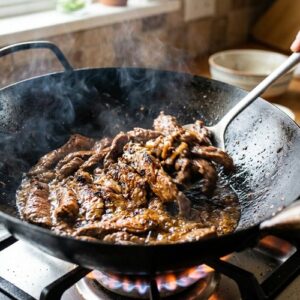
Step 4: The Critical Sear—Building Color and Flavor
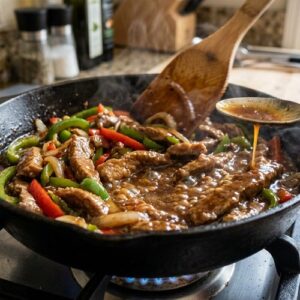
- Heat your wok (or large skillet if you don't have a wok) over high heat until it's smoking—literally, you should see wisps of smoke coming off it. This temperature is non-negotiable; it's what creates that beautiful, caramelized exterior on the beef. Add 1 tablespoon of your neutral oil and let it heat for just 10-15 seconds until it shimmers. Working in batches if necessary (don't overcrowd the wok), add your marinated beef in a single layer. Don't move it for about 30 seconds—this is where the Maillard reaction happens, creating those gorgeous browned edges. Flip each piece and sear the other side for another 30 seconds. The beef should be about 80% cooked at this point; it'll finish cooking when you add it back later. Transfer the beef back to your marinating bowl with all its juices. This is important: those juices contain flavor.
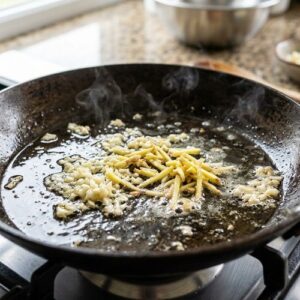
Step 5: Create Aromatic Magic with Ginger and Garlic
- Reduce your heat to medium-high and add the remaining tablespoon of oil. If you're using ginger, add it now and let it toast for about 10 seconds—just enough for the aroma to become evident without letting it burn. Then add your minced garlic. This 10-15 second window is when those aromatics release their essential oils, perfuming the entire dish. You want to smell that garlic, but you don't want it brown or bitter.
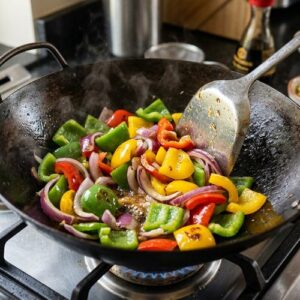
Step 6: Stir-Fry the Vegetables to Brightness
- Immediately add your pepper and onion pieces. Stir constantly for about 1 minute. What you're looking for is vegetables that have started to soften slightly but still have a slight firmness when you bite into them—this texture contrast is part of what makes the dish feel alive and fresh. The onions will begin to pick up some color on their edges, which is exactly what you want. This is where experience teaches you to trust your senses. You're not aiming for raw vegetables, and you're not aiming for fully cooked vegetables either. You're aiming for that middle ground where everything still has personality.
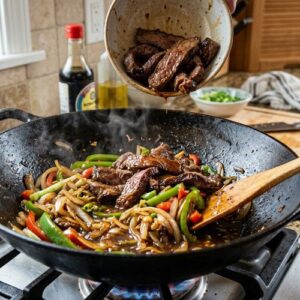
Step 7: Bring Everything Together
- Add your seared beef back to the wok along with any juices that collected in the bowl. Stir everything together for about 15 seconds, making sure the beef and vegetables are evenly distributed. The wok should be a riot of color at this point—deep mahogany beef, bright green peppers, warm red pepper, golden caramelized onions. Now increase your heat back to high. Take your prepared sauce and give it a good stir (the cornstarch will have settled) and pour it into the wok. This is the moment where the magic happens. The cornstarch hits the heat and immediately begins thickening, creating that silky glaze that clings to every piece of beef and vegetable.
Step 8: The Final Toss and Sauce Adjustment
- Stir constantly for about 30-45 seconds while the sauce thickens. You're looking for a sauce that coats a spoon but still flows slightly—not so thin it runs off everything, and not so thick it's gluey. If your sauce looks too thick, add a splash of chicken stock or water (a tablespoon at a time). If it's too thin, let it cook for another 10-15 seconds and check again. The sauce should be glossy and slightly thickened, clinging to the beef and vegetables in that beautiful way that makes your mouth water before you even taste it.
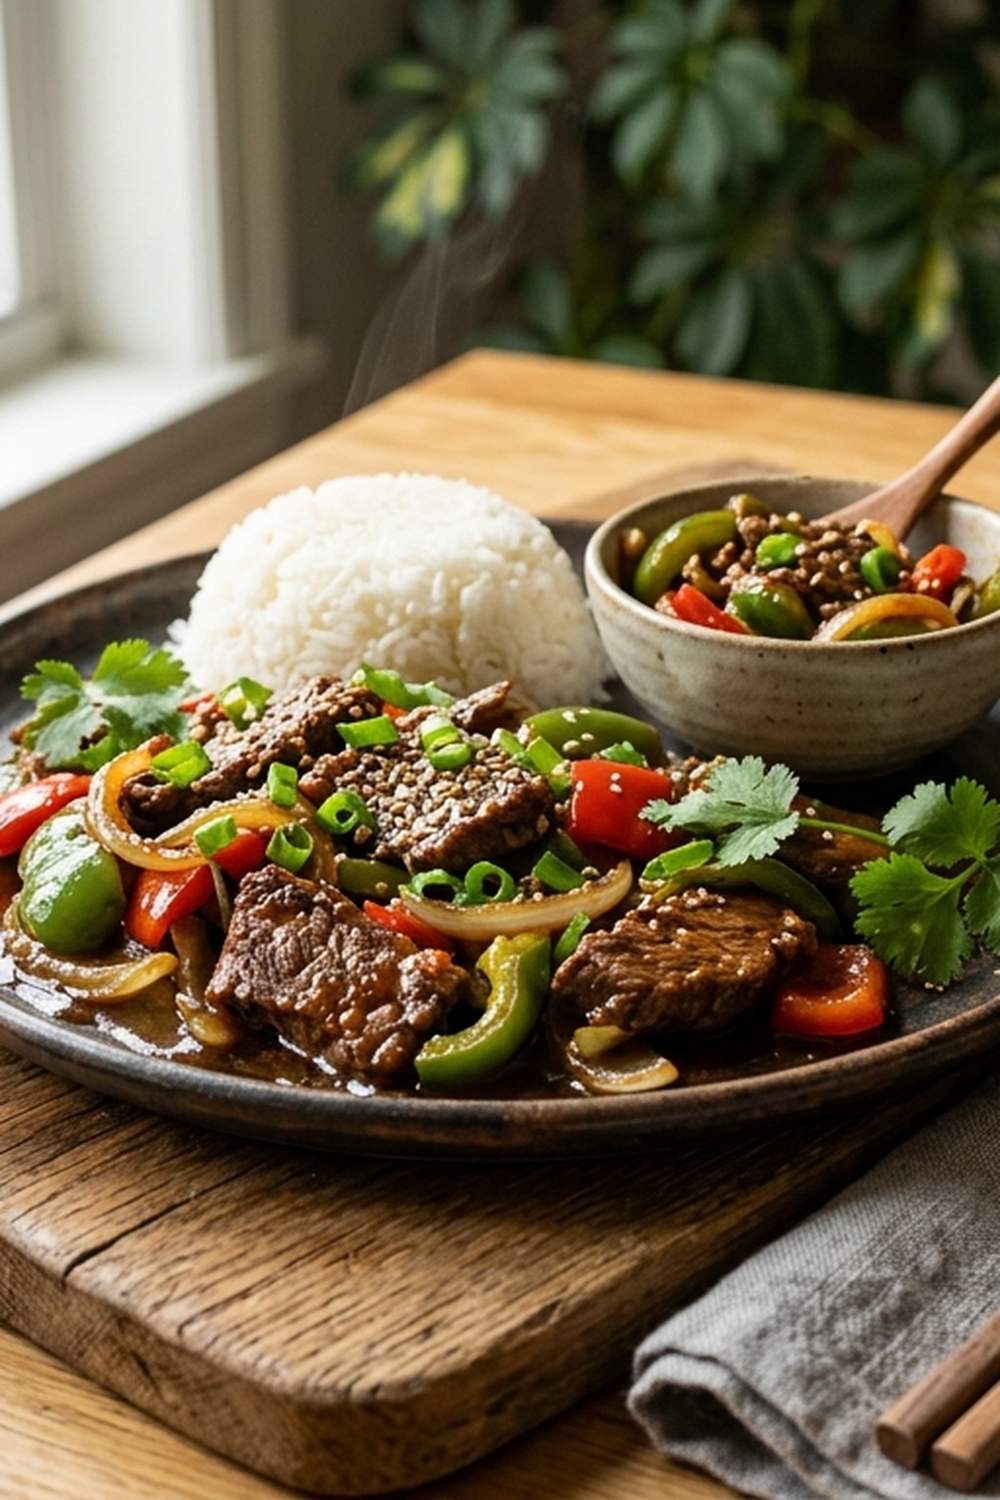
Step 9: Plating for Maximum Impact
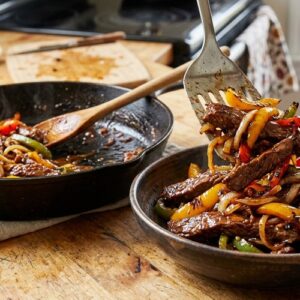
- Transfer everything to your serving plate or bowl while it's still hot. This is crucial: the temperature and the shine of the sauce fade quickly, so serve immediately. If you have sesame seeds, sprinkle them over the top now. If you have sliced green onions, add them for color and freshness. The white and green provide a visual pop against the mahogany sauce. Serve alongside steamed jasmine or white rice, which provides a neutral canvas for the rich, glossy beef and vegetables. The rice also helps balance the sodium and umami intensity of the sauce—a nutritional consideration that's also a practical one.
Notes
- Natural light from the side - This dish shines (literally) in natural light from a 45-degree angle. The side lighting catches the gloss of the sauce and creates shadows that show texture. Harsh overhead light flattens everything. If you're photographing indoors, position your plate near a window where light comes from the side. The time just before golden hour (that last 30-60 minutes before sunset) creates the most flattering, warm light.
- Shoot immediately after plating - The sauce is most glossy in the first 2-3 minutes after plating. The beef stays at its most beautiful right when it comes off the heat. Wait too long and everything looks tired and dull. Have your camera ready before you even finish plating.
- Use a shallow depth of field - If you have any ability to control your camera (even on a smartphone), focus on the foreground beef and let the background slightly blur. This draws the eye to what matters and makes the photo feel more professional and intentional.